Python 3 Installation & Setup Guide
Installing Python on your local computer is the first step to becoming a proper Python programmer. While you can use online tools to run Python, most serious developers still rely on a local installation to work on individual and team projects. This tutorial will show the current best practice approach for checking what version of Python, if any, is already on your machine and installing or updating Python for Windows, macOS, or Linux.
Table of Contents
- Install Python on Windows
- Install Python on macOS
- Install Python on Linux
- Install Python on Chromebook
- Next Steps
Install Python on Windows
Microsoft hosts a community release of Python 3 in the Microsoft Store for computers running Windows 10+, the latest version of the operating system. This is now the recommended way to install Python: it handles auto-updates, can be uninstalled easily, and does not update PATH variables in a way that breaks other applications.
To begin, click on the search bar at the bottom left of your screen and type “python.” Click on the best match result.
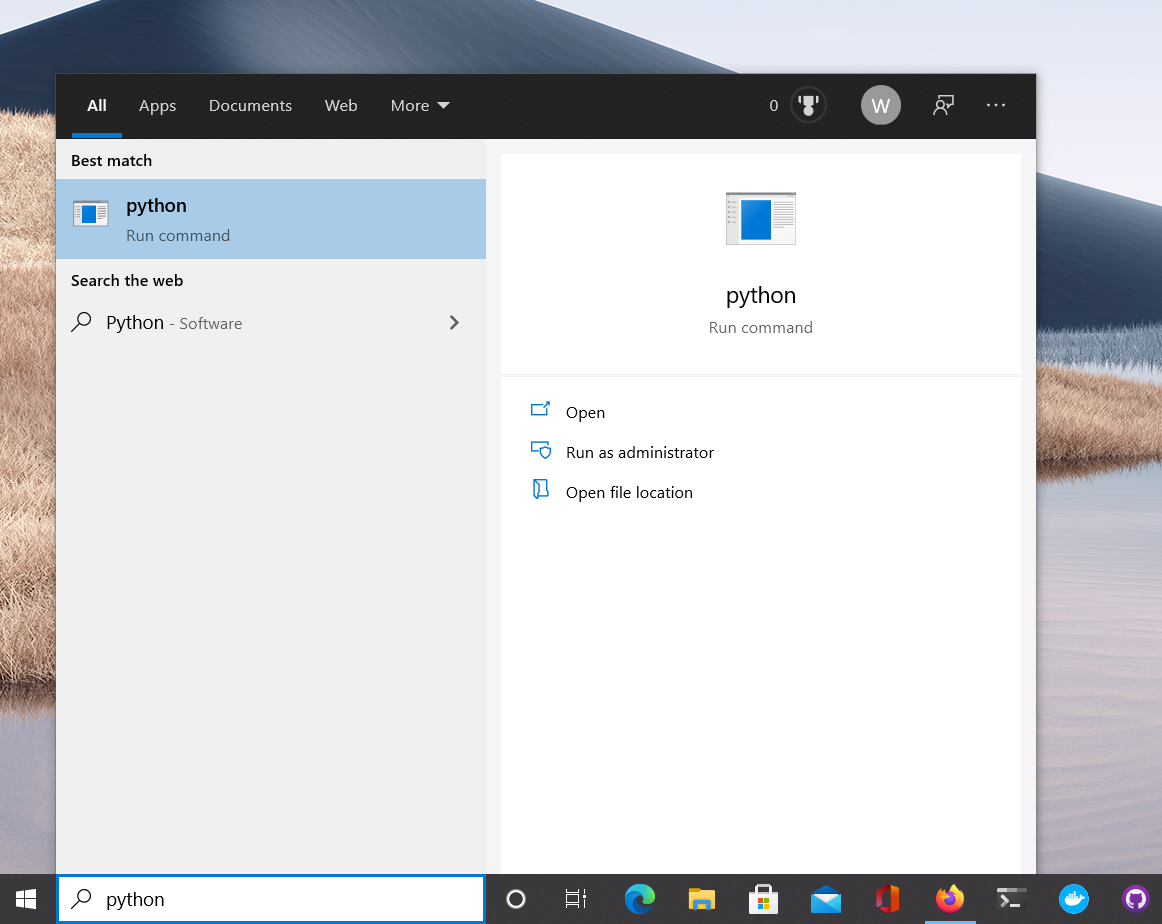
This automatically launches Python 3.9 on the Microsoft Store. Click on the blue “Get” button to download it.
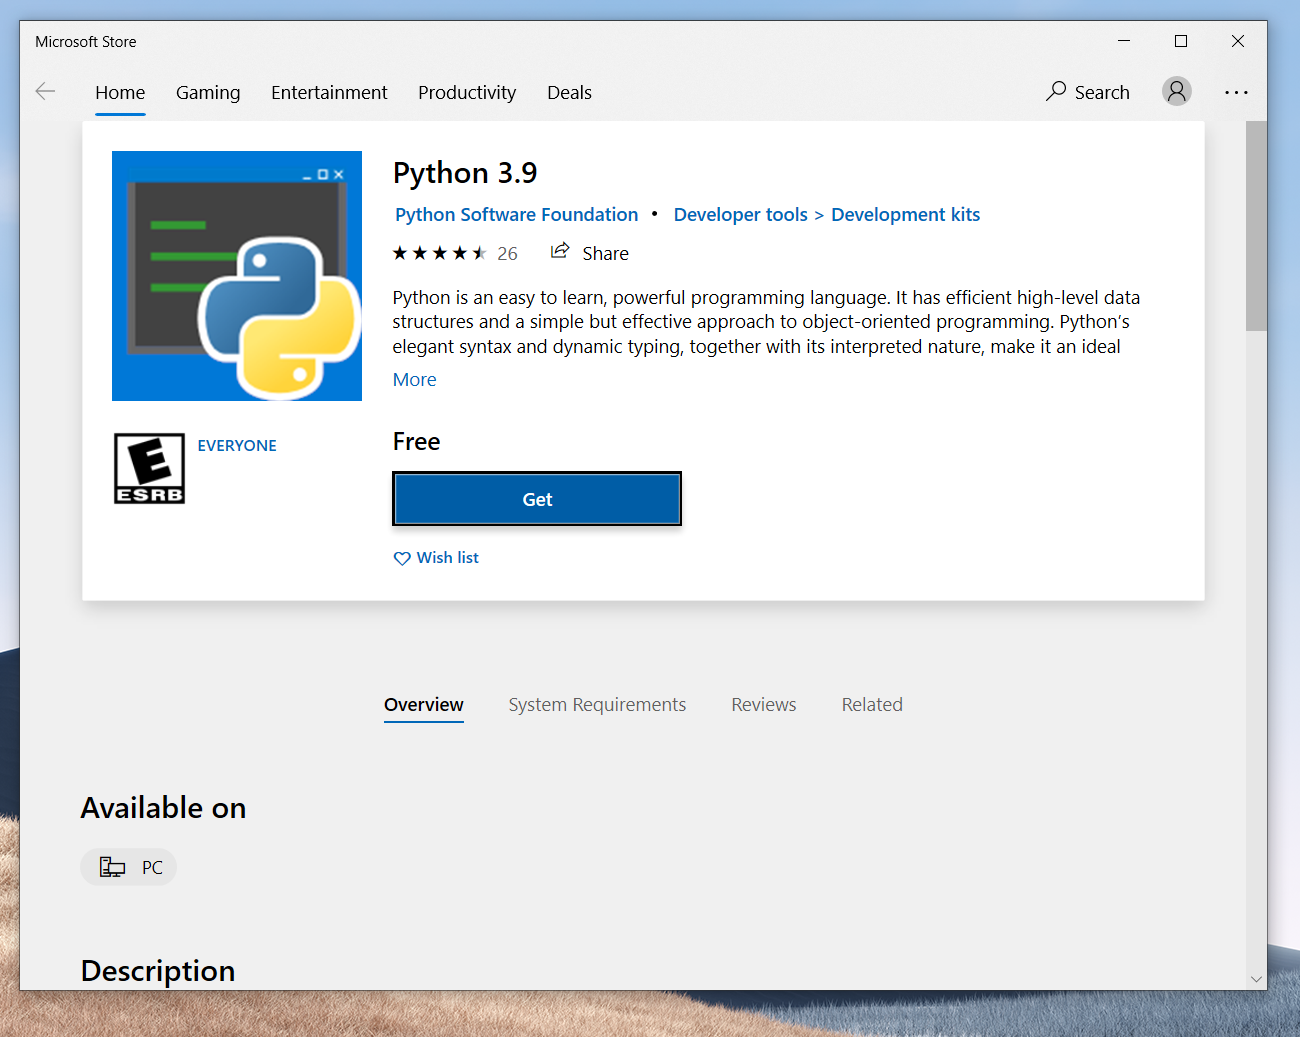
Note: If you have a “See System Requirements” link below the Get button it’s likely you need to upgrade to Windows 10. And if you’re not logged into your Microsoft account, there will be a prompt asking if you want to sign in. It’s fine to say “No, thanks” for now.
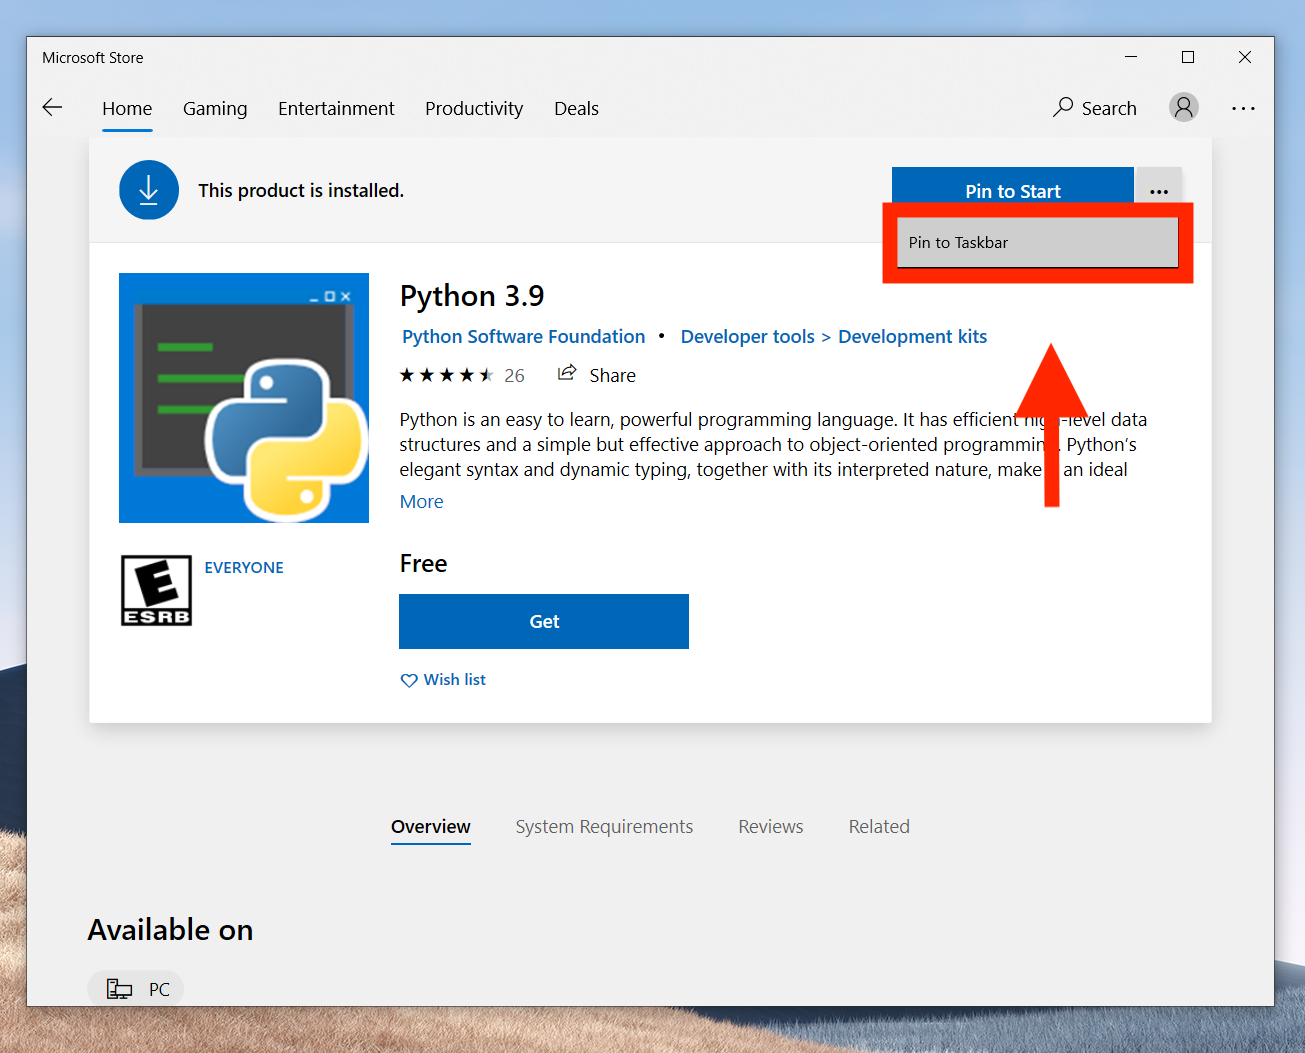
Once downloaded, click on the three dots ... after “Pin to Start” and click on “Pin to Taskbar” so it is always available.
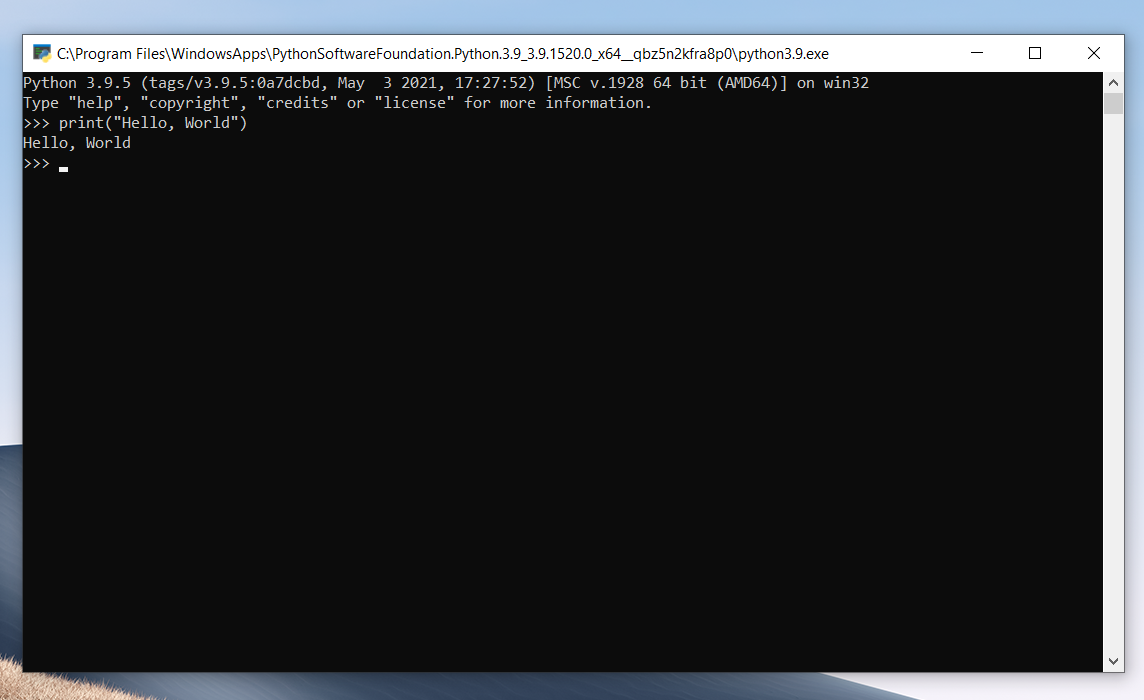
Click on the pinned Python logo on the bottom taskbar.

This opens up the Python IDLE. Try a simple print("Hello, World") command to confirm everything works:
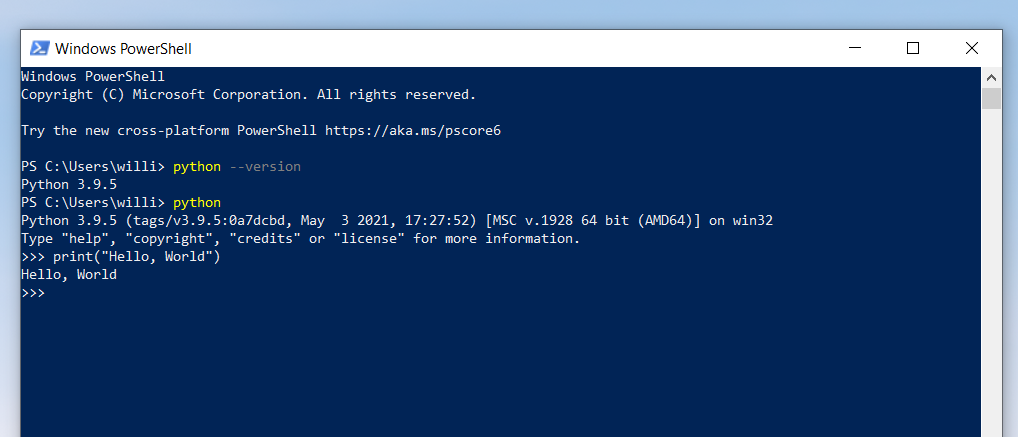
It is also possible to access it via the command line. On Windows, type “PowerShell” in the Start Menu search bar in the lower left corner.

This opens up the Windows PowerShell terminal which has a dark blue background. Type python --version to confirm which version is installed and then the same print("Hello, World") command as before.
That’s it! You’re ready to go.
Install Python on macOS
On Mac the recommended approach is to use the official Python.org installer. Previously the package manager Homebrew was a great choice–it handled software installs and upgrades elegantly in most cases–but for Python itself there are several serious issues detailed by Justin Mayer in this post. As a result, using the official Python.org installer is now a better option.
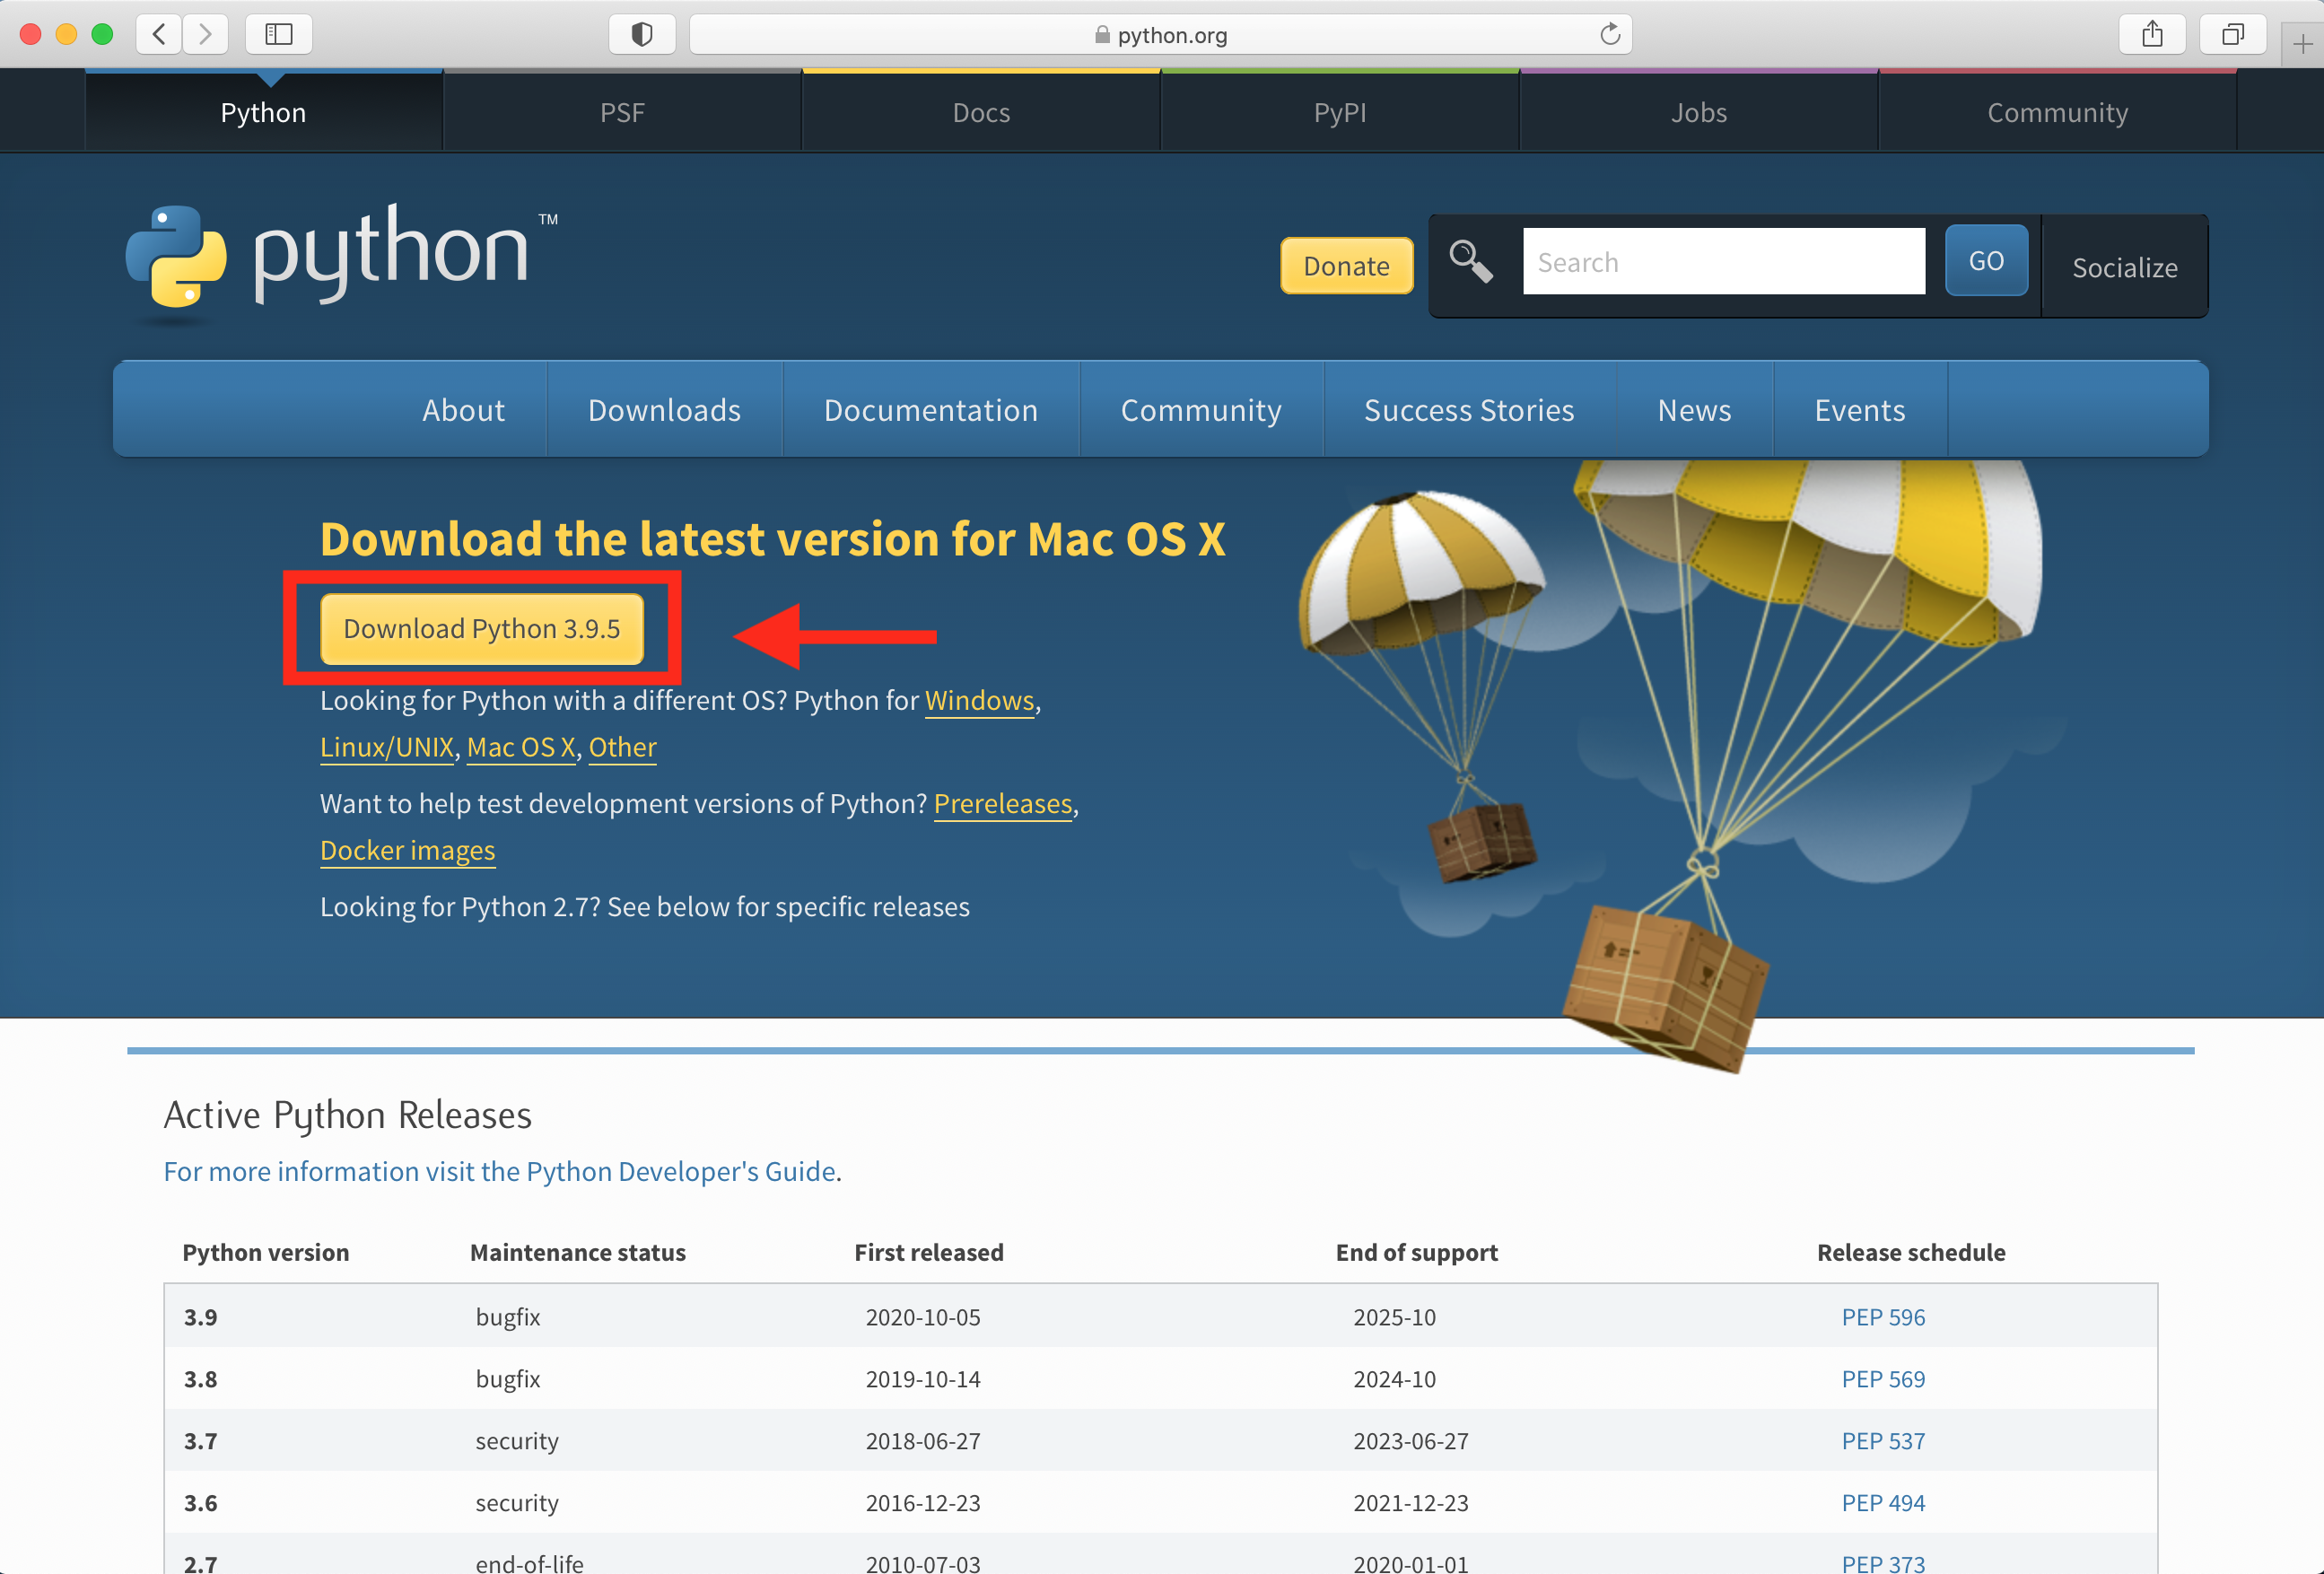
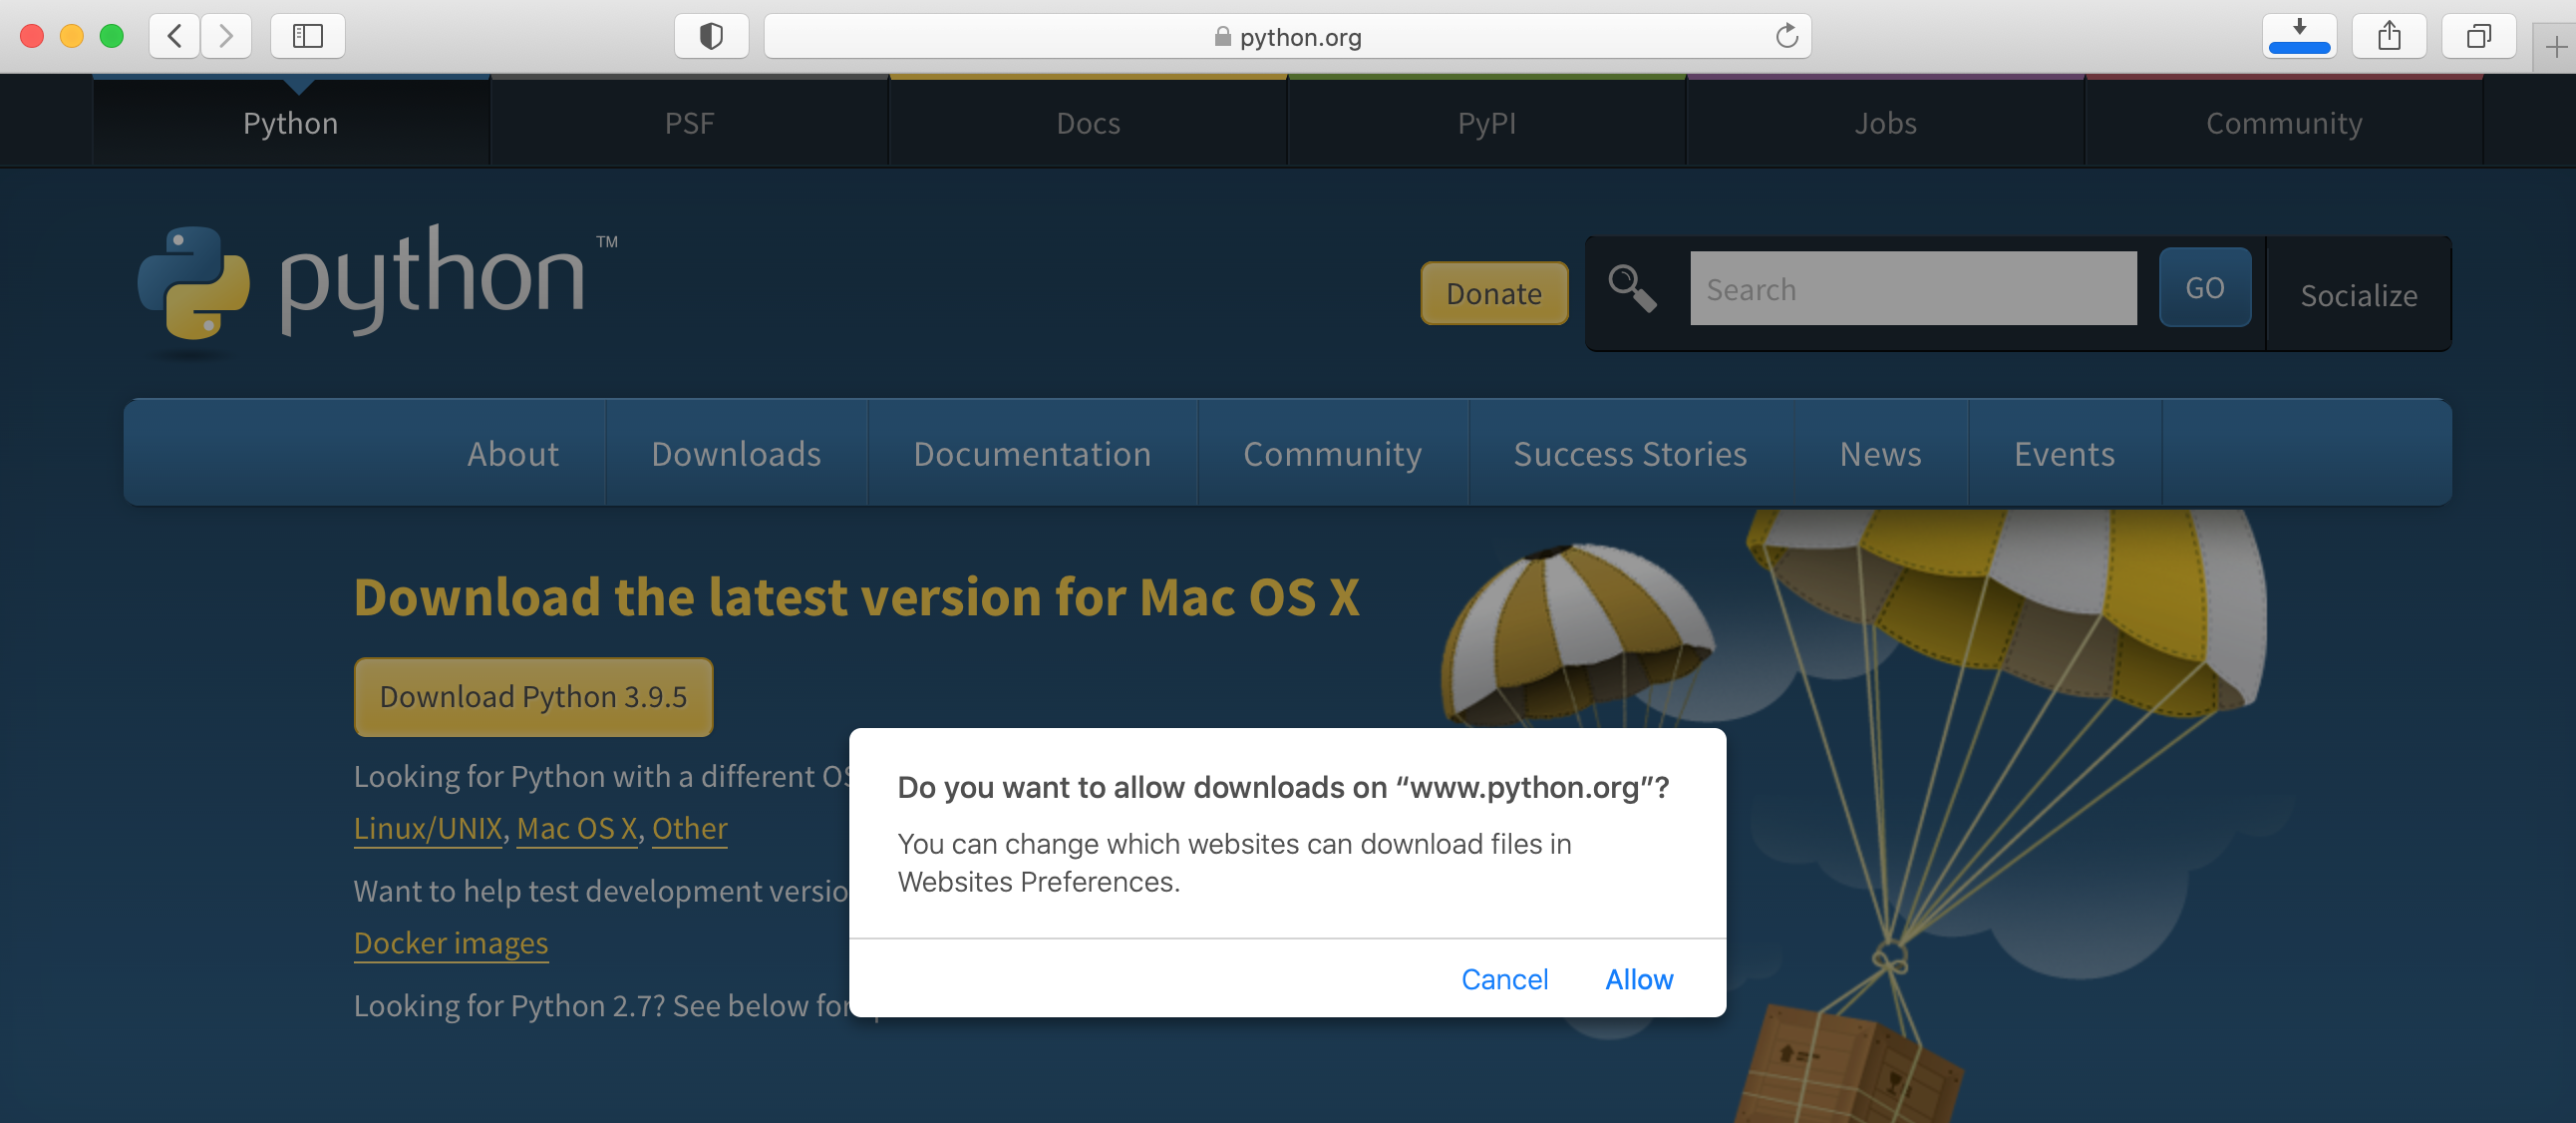
Open a new browser window and visit the Downloads page. Click on the button for “Download Python 3.9.5” or whatever the latest version is.
Click “Allow” on the popup asking if you want to allow downloads from “www.python.org.”
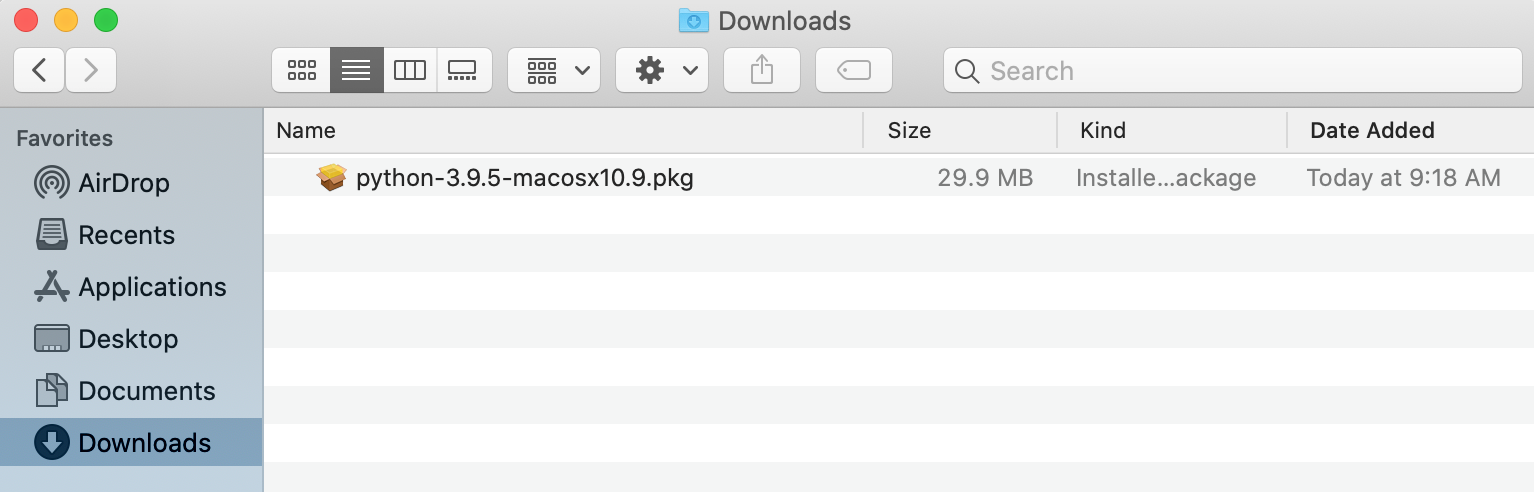
Open up a new Finder window (the keyboard shortcut of pressing Command + n will do this) and click on the sidebar for “Downloads.” Then doubleclick on the Python package to install it.
This launches the Python Installer. Click on the “Continue” button.
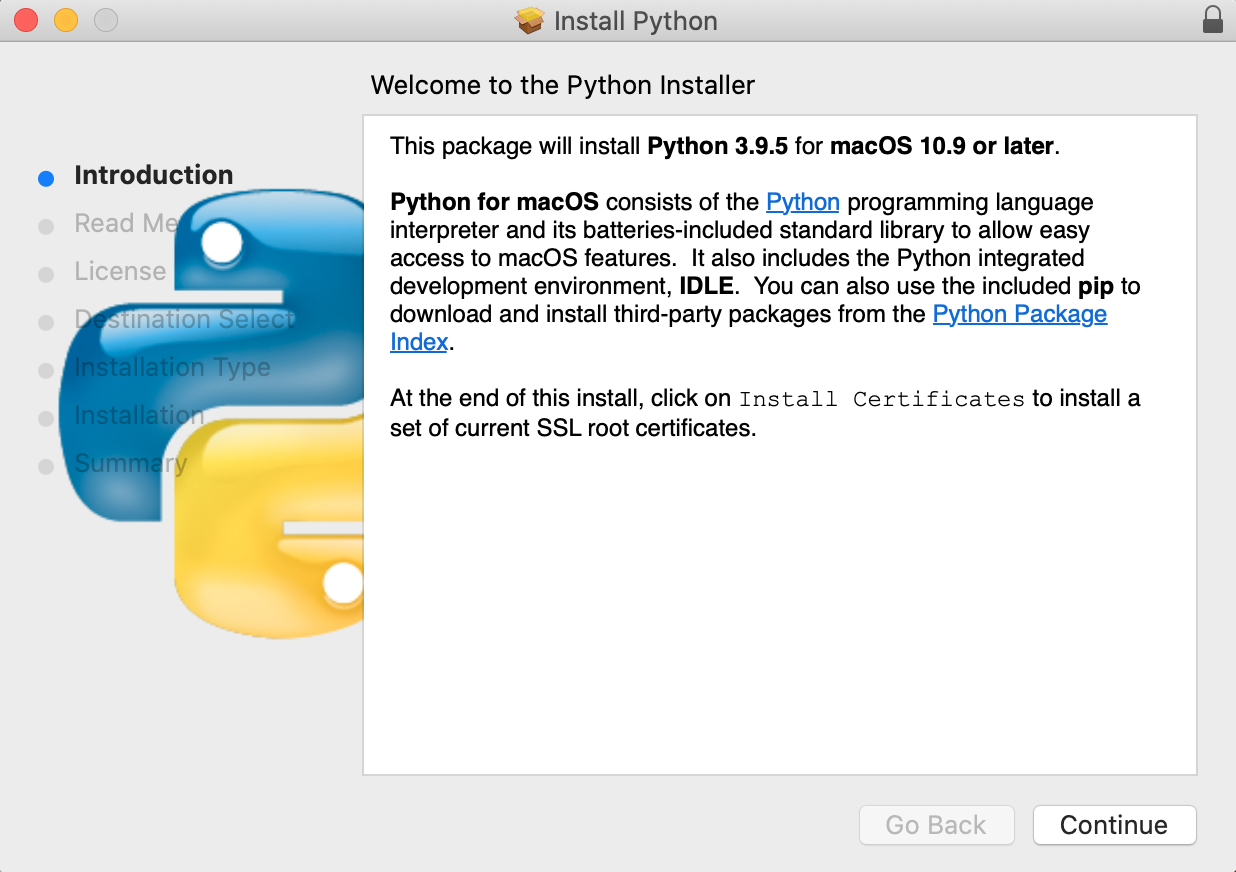
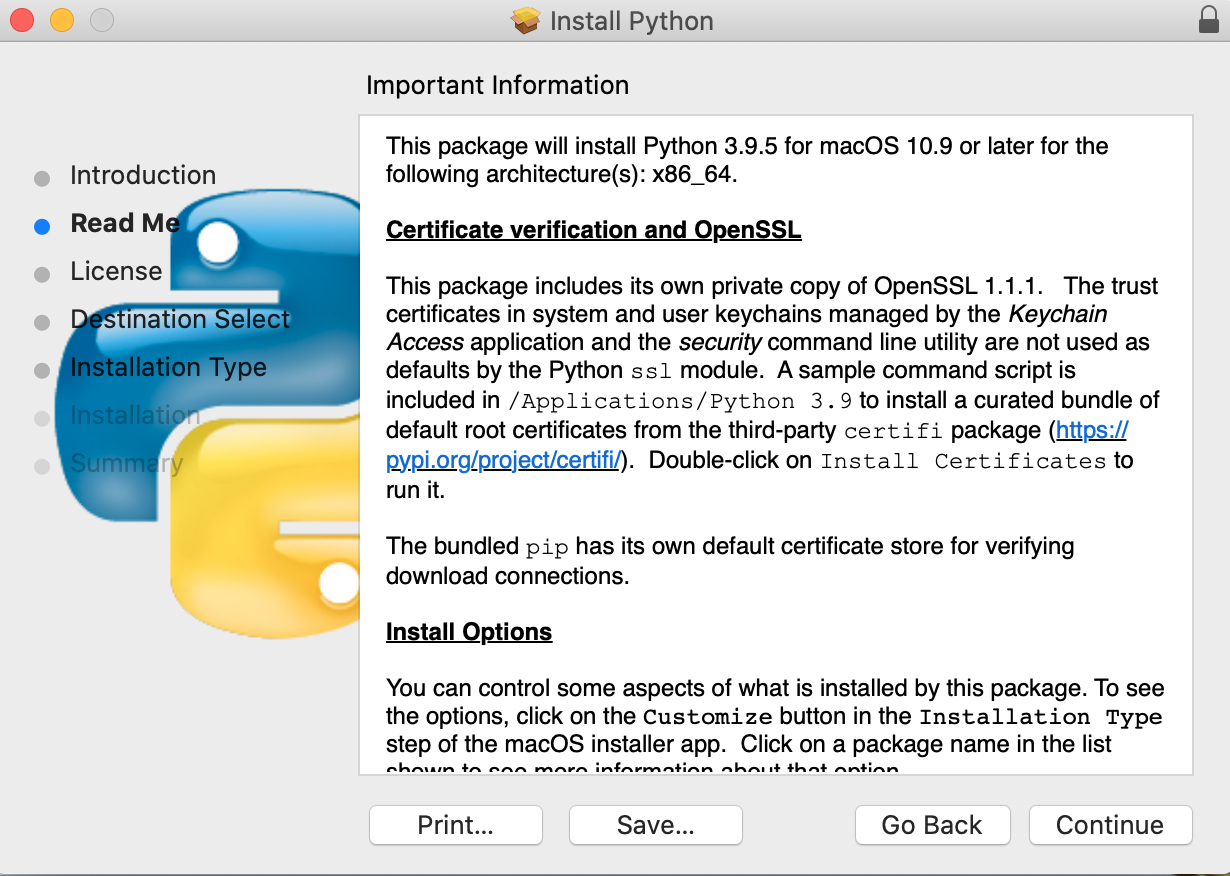
Next up are several screens. Click “Continue” again on the Read Me page.
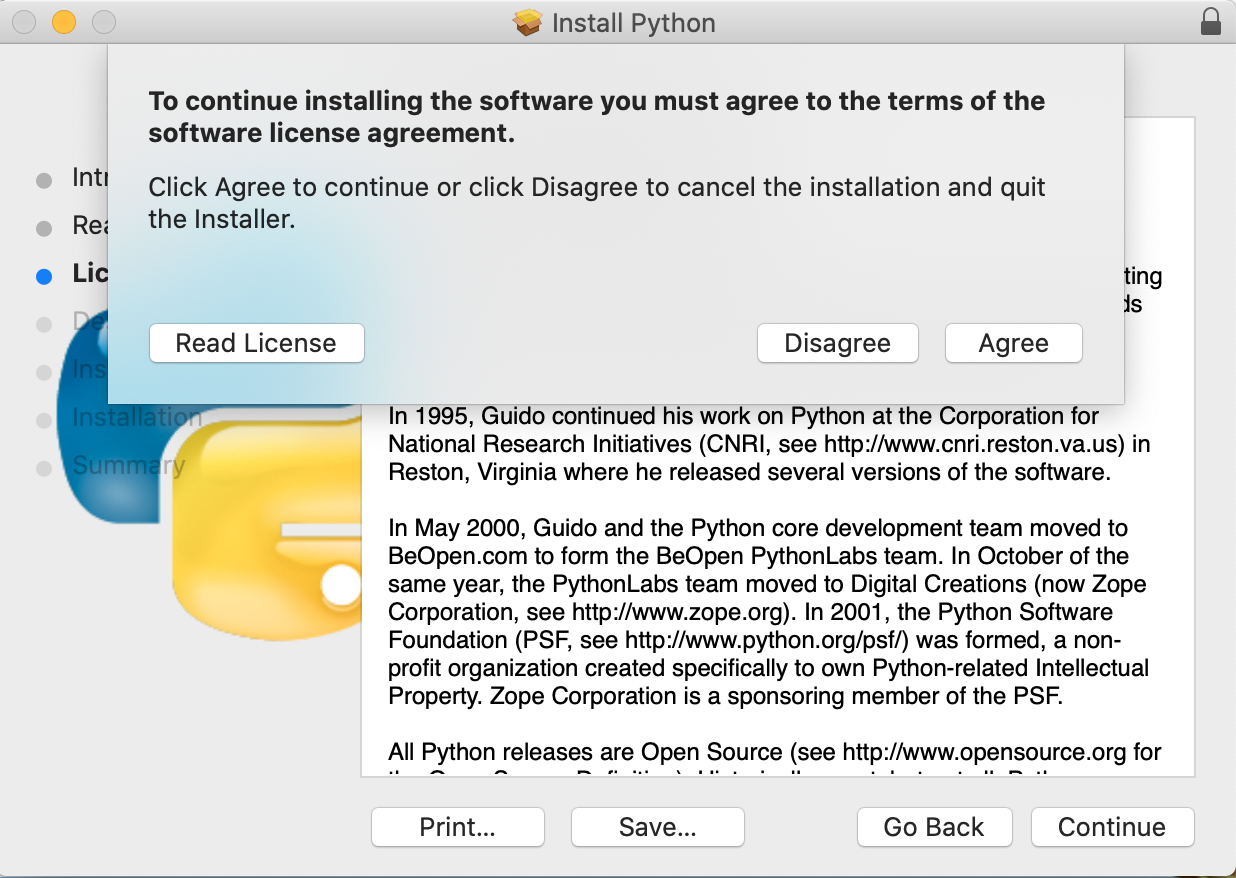
Next is the License page. Click “Continue” which will launch a pop up asking if you agree to the terms. Click on “Agree.”
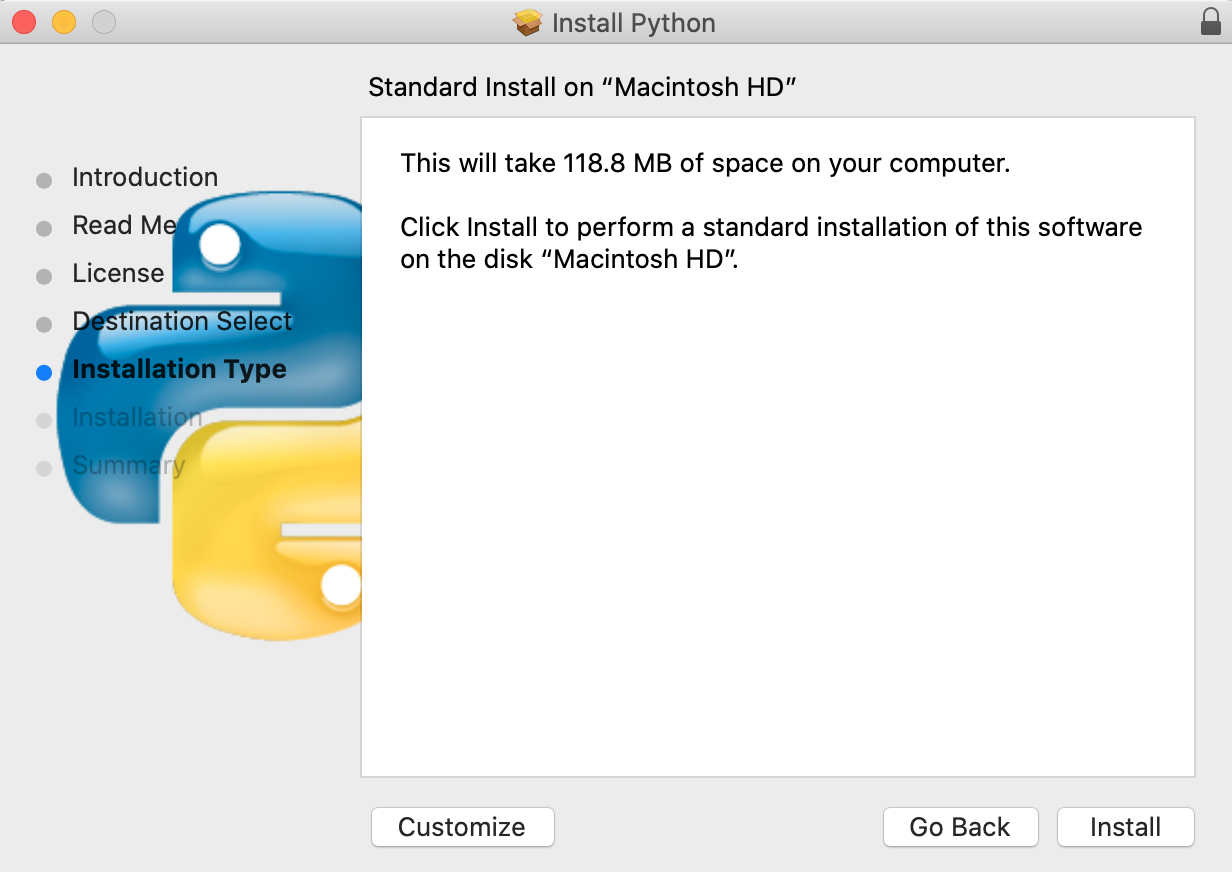
The standard install will save Python to your disk. Click on the “Install” button.
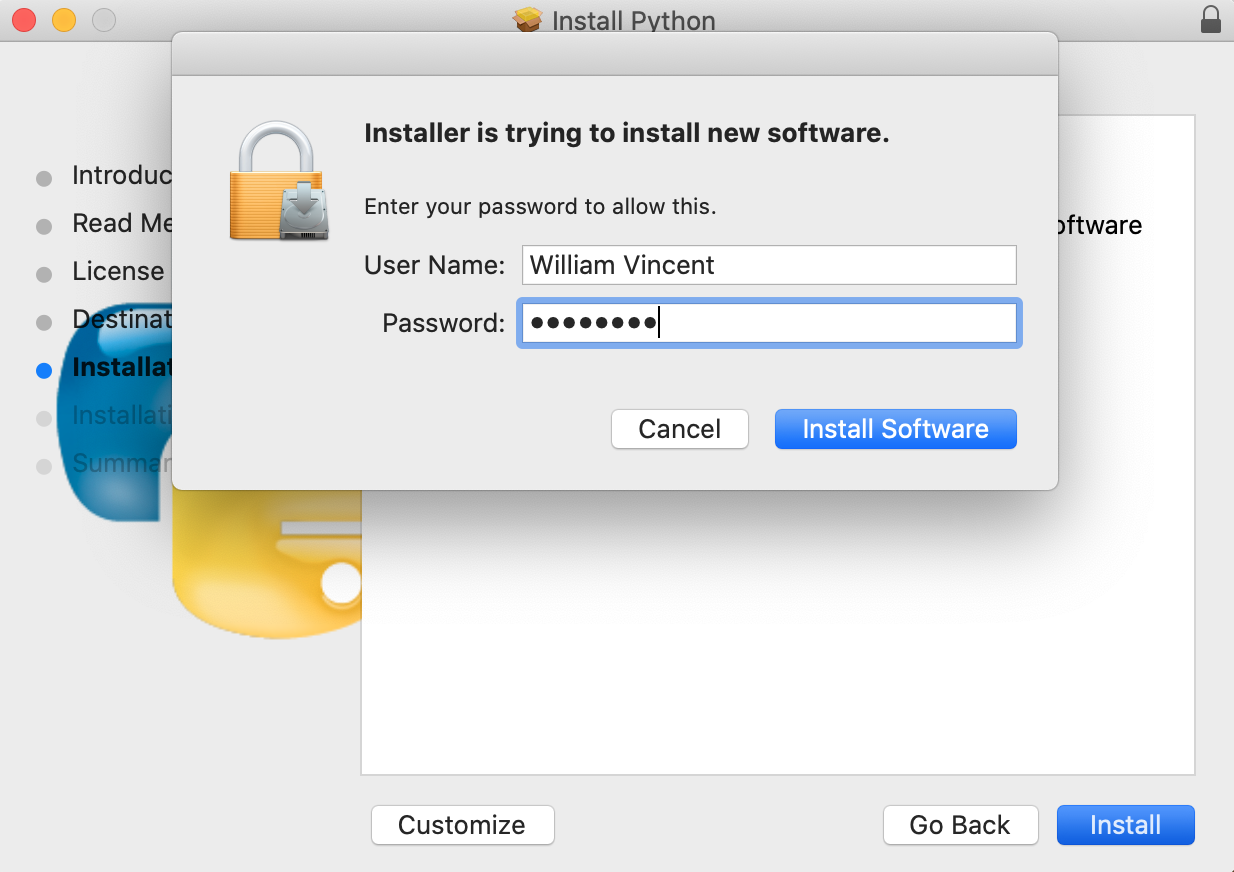
This will launch another pop-up asking for your password. Enter it and click “Install Software.”
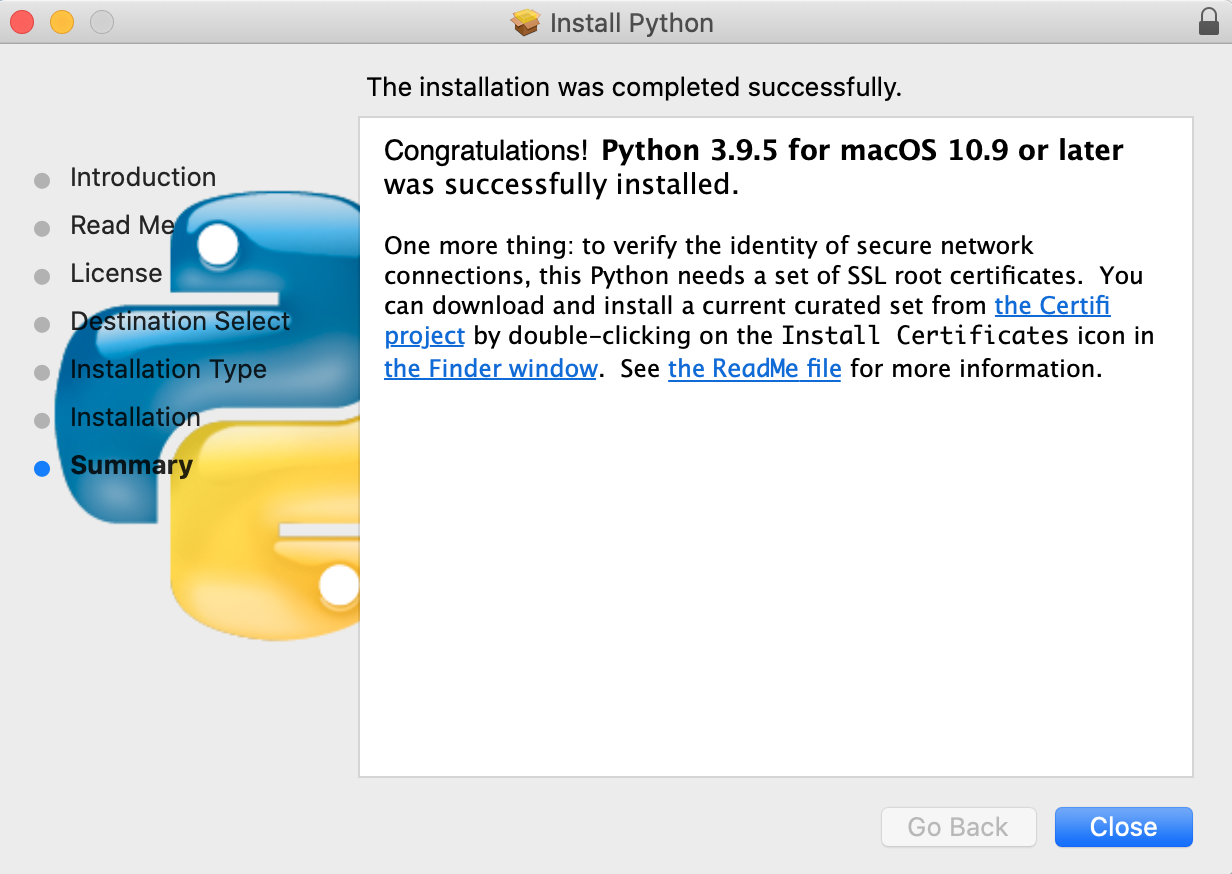
After installation is a Summary window. You can hit the “Close” button on this.
A popup will ask if you want to move the Python installer to the trash. Click on “Move to Trash” as we no longer need the installer.

There will also be a new Finder window opened with the Python 3.9 package.
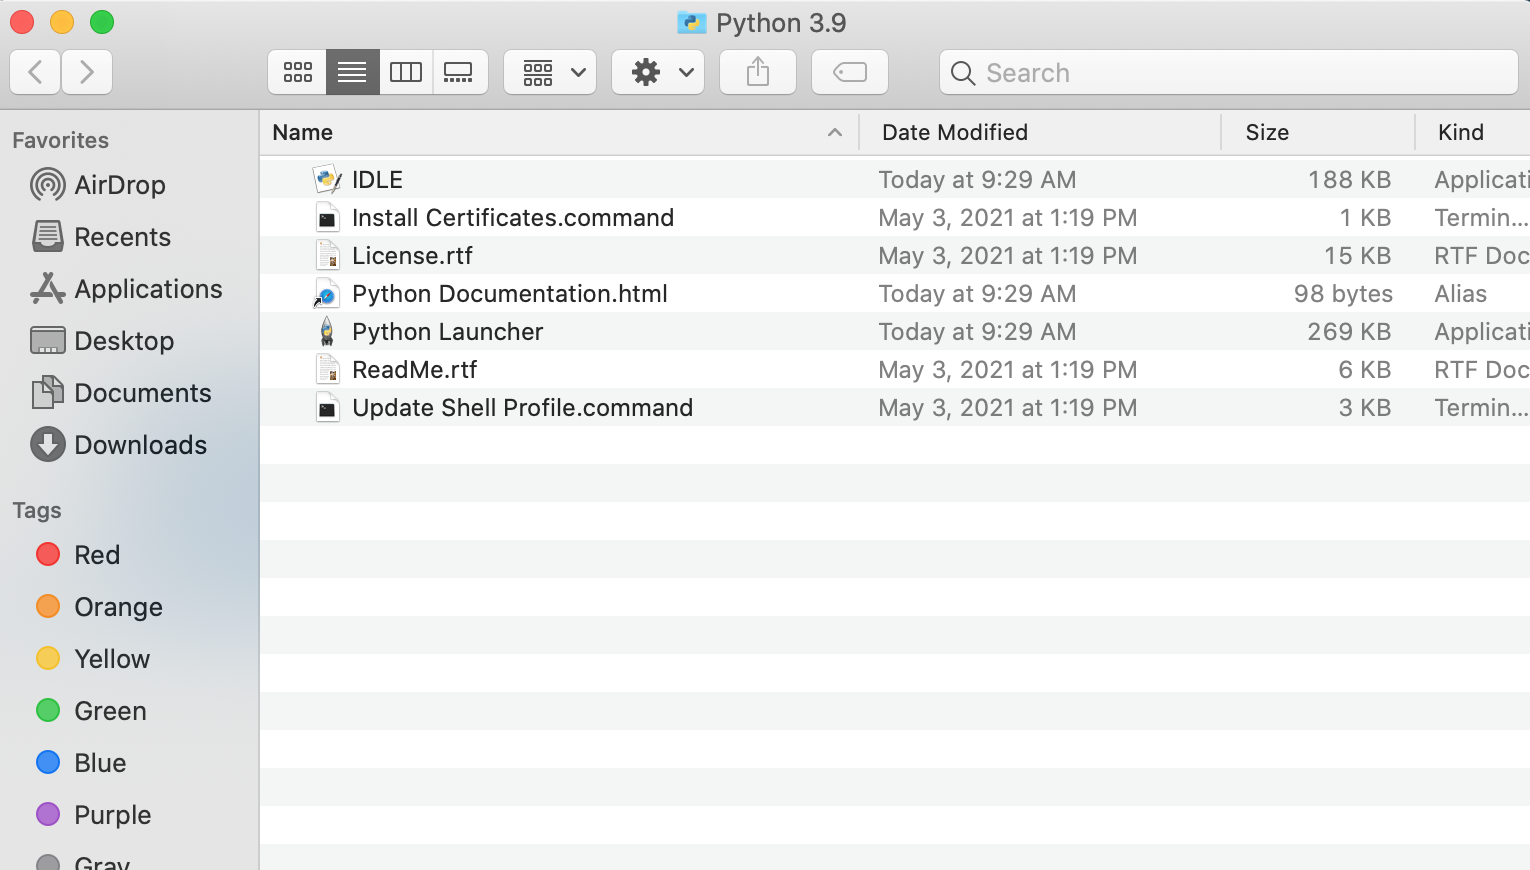
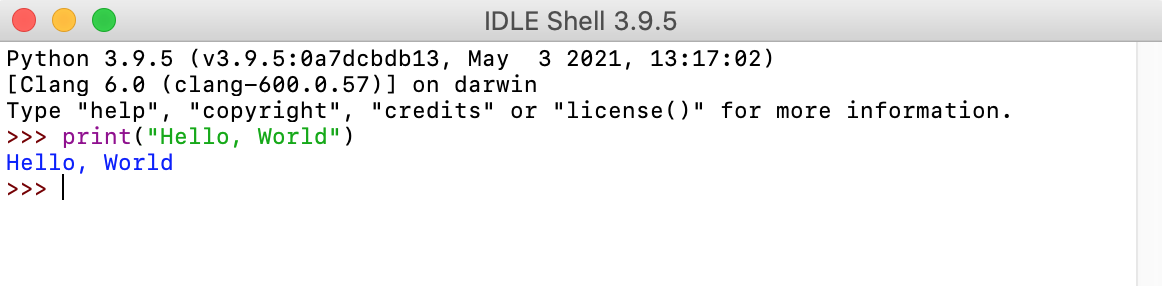
The simplest way to use Python is via the built-in IDLE. Click on the link for IDLE which launches a new Shell. You can type any command here such as print("Hello, World").
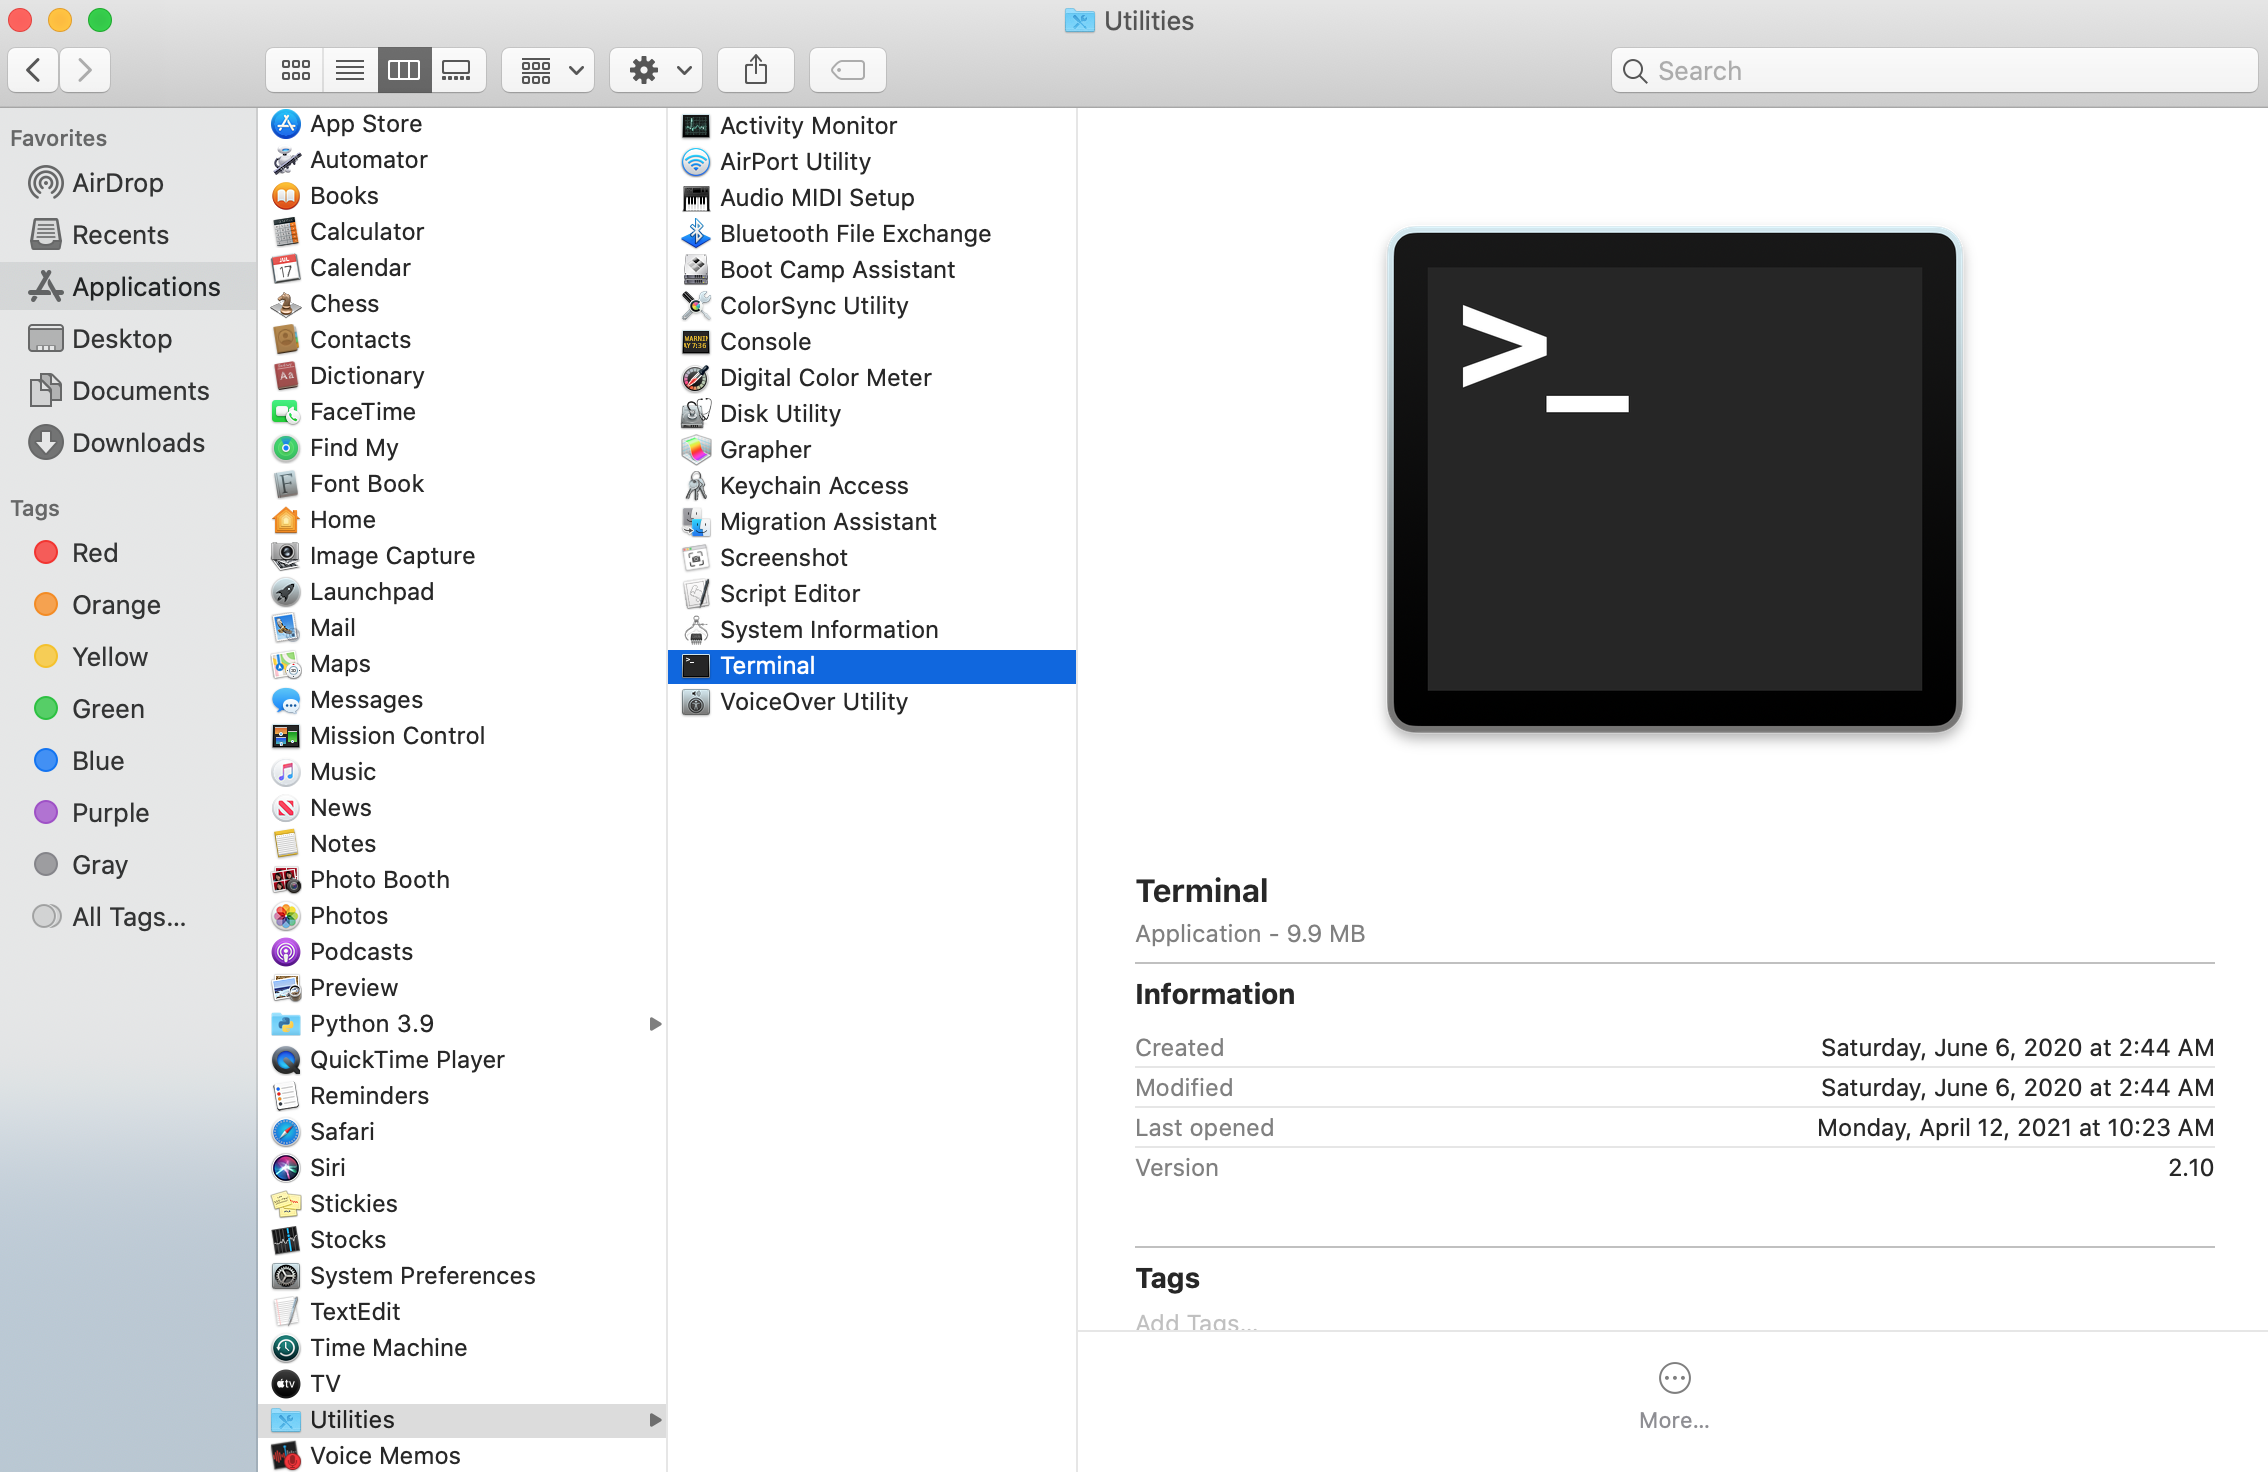
You can also now access Python from the command line. Open up the Terminal application which is located within Applications -> Utilities -> Terminal.
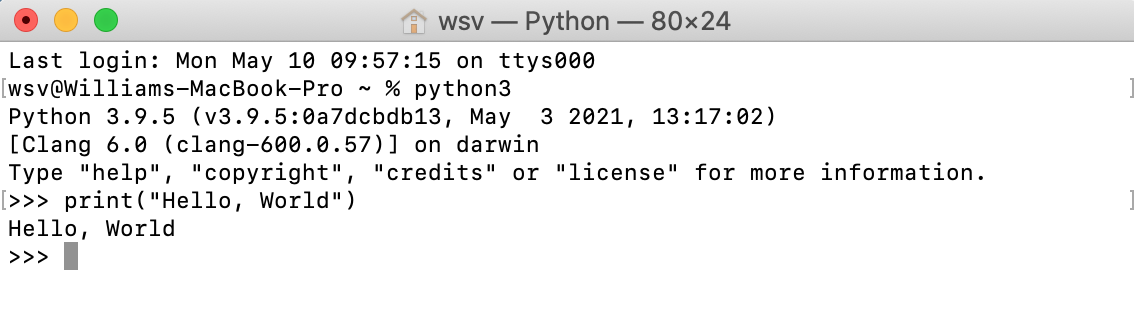
Once open, type python3 to launch the Python interpreter from the command line. When you see the prompt >>> you know it is working. To confirm, type print("Hello, World") again.
Install Python on Linux
Python is usually installed by default on most modern Linux systems. To check what your currently have, open a terminal and run the following command (note the dollar sign $ is the beginning of the prompt and should not be included!):
$ python --version
Python 3.9.5
If you see a version of Python starting with a 2, such as Python 2.7.10, then try the same command using python3 instead of python:
$ python3 --version
Python 3.9.5
The latest version of Python is 3.9 (as of this writing) but generally 3.6+ will provide modern features, such as f-strings and async/await, that are widely used. There are many installation options on Linux but perhaps the simplest is to use deadsnakes.
Within your terminal enter the following three commands:
$ sudo add-apt-repository ppa:deadsnakes/ppa
$ sudo apt-get update
$ sudo apt install python3.9
This will install Python 3.9 and a new Python session can be started by typing python3.9 from the terminal:
$ python3.9
>>>
Install Python on Chromebook
A Chromebook runs ChromeOS as its operating system and historically running anything other than a web app–such as Python–was challenging.
However, that is no longer the case! You can now run Linux apps on ChromeOS which opens the door to using MiniConda to install Python 3.
Make sure you are logged in first. These steps won’t work if you’re still in Guest mode!
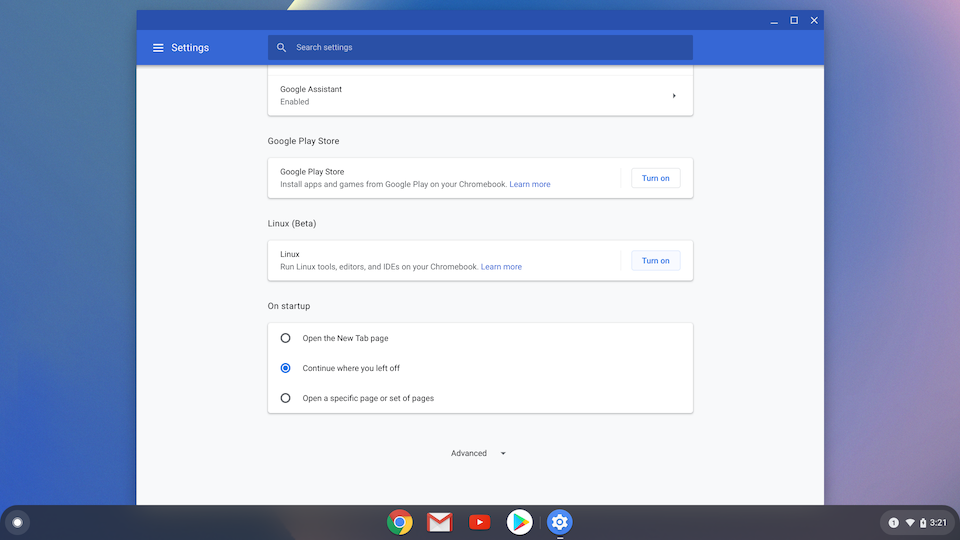
Open your Chromebook’s system settings by clicking on the Time in the lower right corner and then the Gear icon for Settings.
![]()
Scroll down to “Linux (Beta)” and select Turn On.
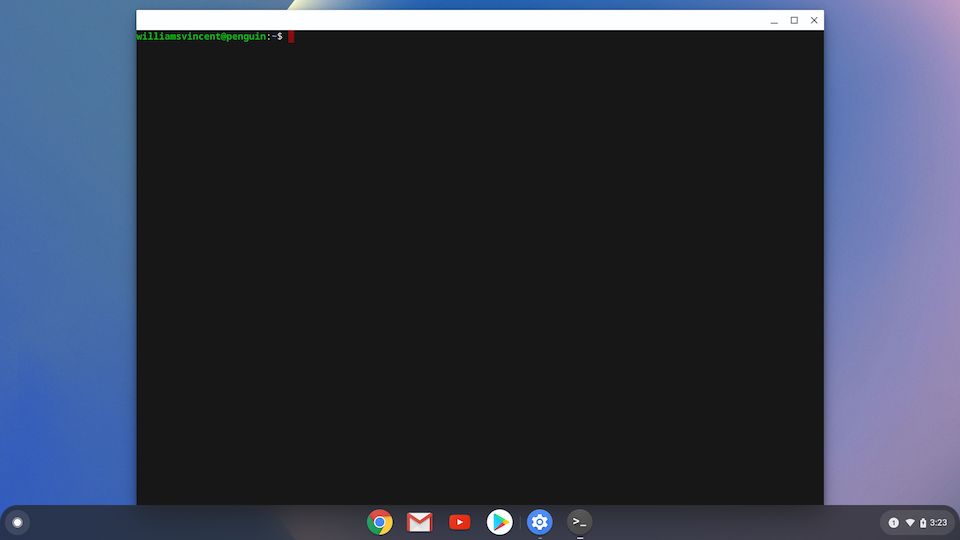
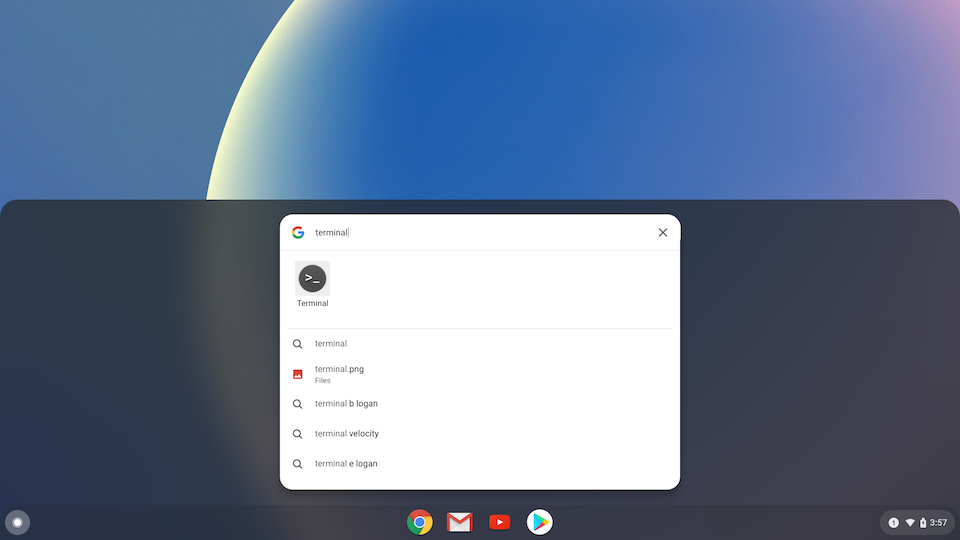
Follow the prompts and at the end a Terminal window will open. You can run Linux commands here. (Tip: pin it to the dock for easy access).
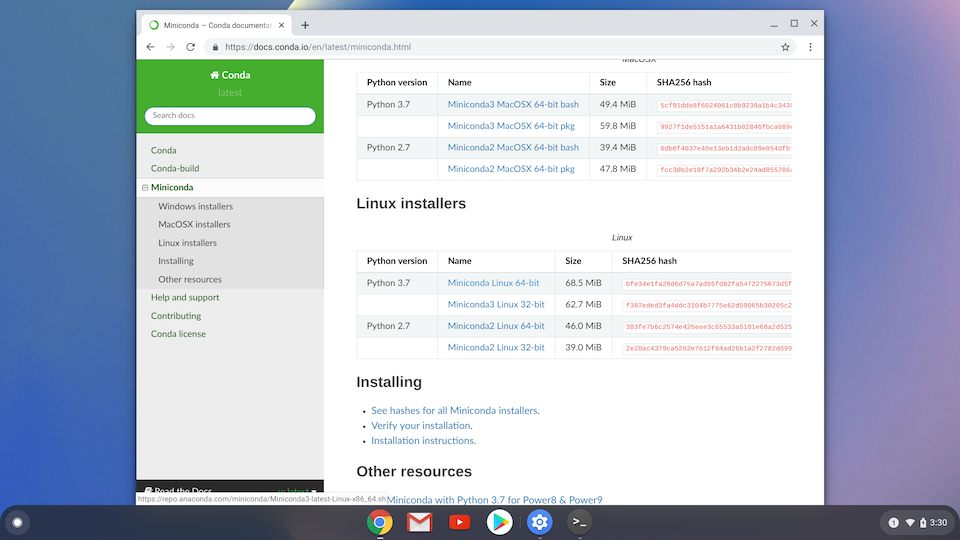
MiniConda is a free distribution of Python that works on Linux computers. It provides a basic implementation of Python and the ability to add additional packages manually as needed. Since disk space is at a premium, we will use this as opposed to Anaconda, its full-featured cousin, which includes many Python packages like numpy, scipy, and ipython notebook automatically.
Navigate to the MiniConda site, scroll down to the “Linux installers” section, and click on the link for 64-bit version of Python 3.8.
Once downloaded, click on the “Confirm download” pop-up and select “Keep”.

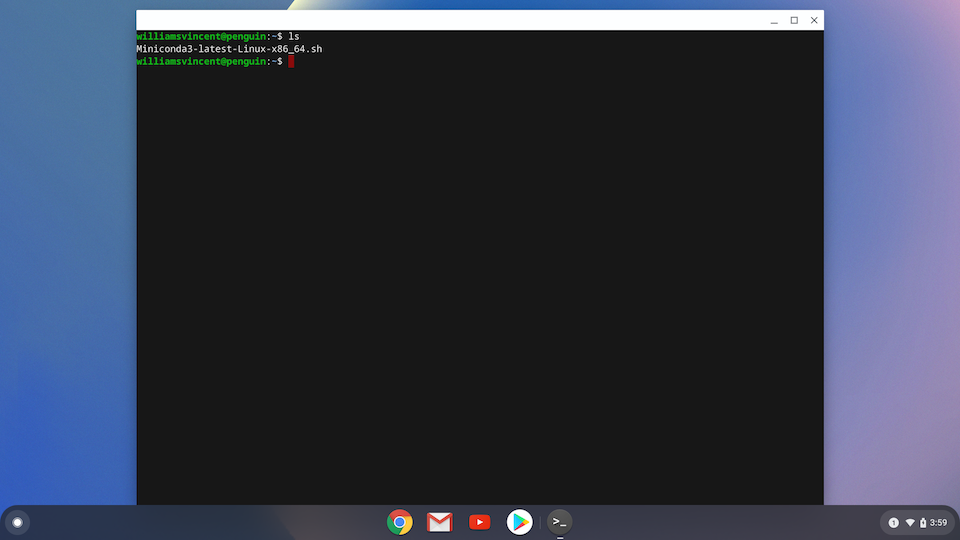
It’s very important to now move the installer into the “Linux files” section of your computer. Open up your files by clicking on the Launcher button in the lower left corner, then the Up arrow, and then Files under the search bar. The file will be named something like Miniconda3-latest-Linux-x86_64.sh.
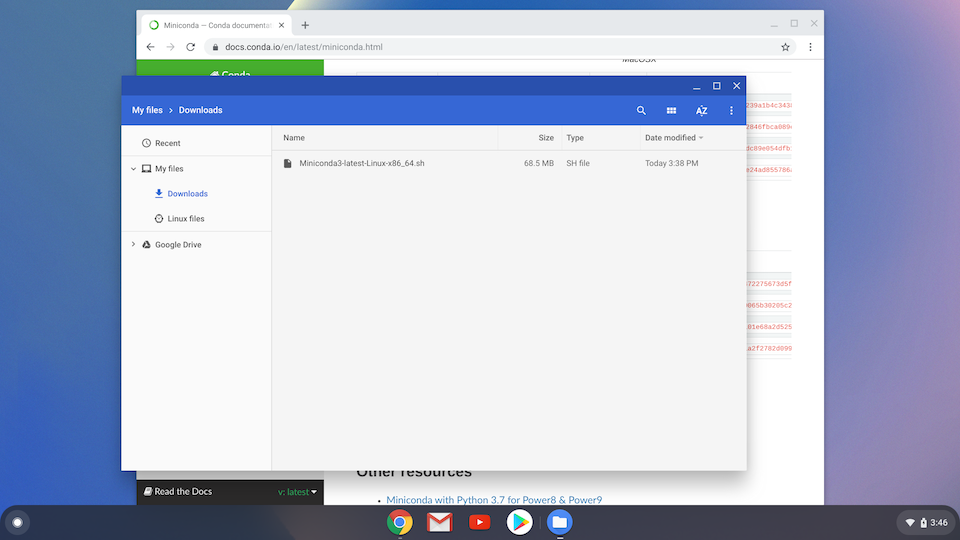
Drag it from Downloads into the Linux Files section.

Open the Terminal app from the Start area.
Confirm that the Miniconda installer is in your current directory by typing ls.
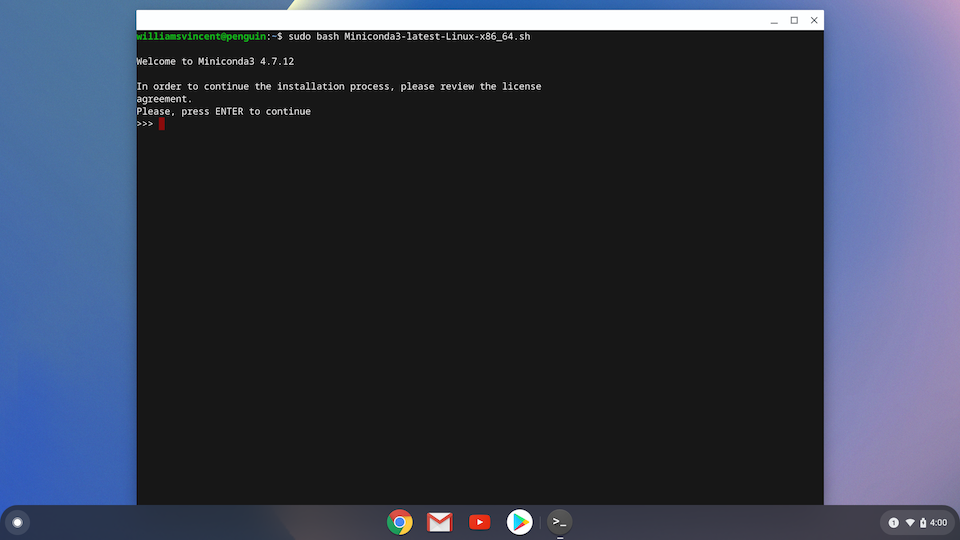
Then to install it run the command sudo bash Miniconda3-latest-Linux-x86_64.sh.
$ sudo bash Miniconda3-latest-Linux-x86_64.sh
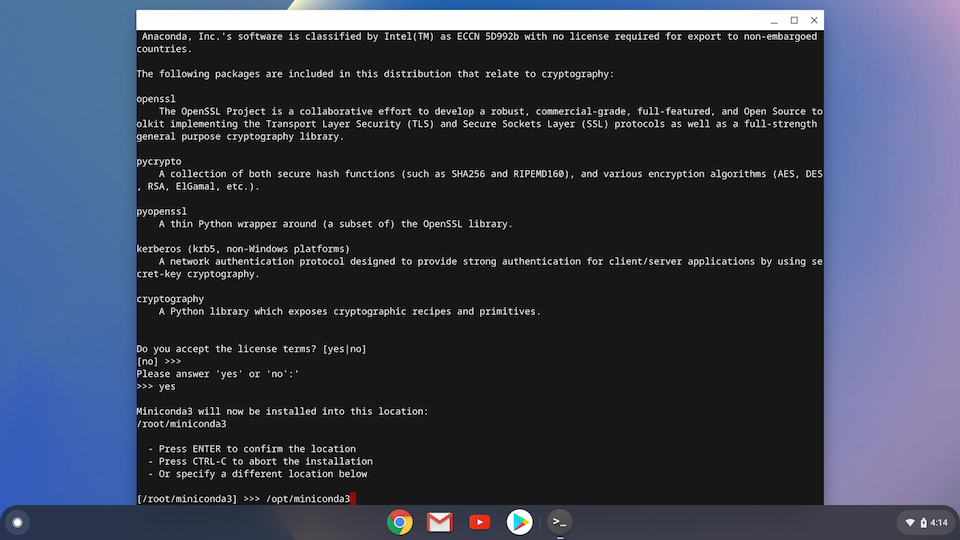
There will be a prompt to review the license. Click Enter to continue:
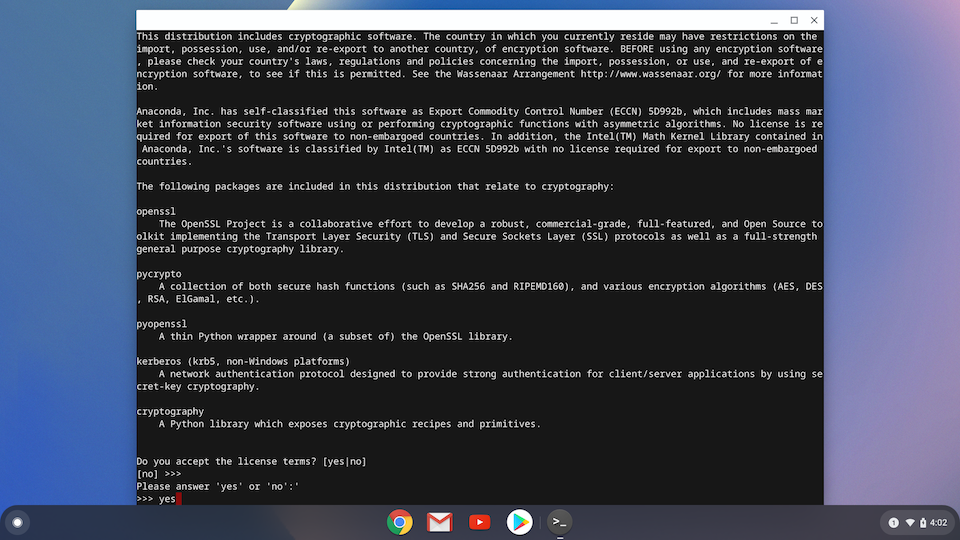
| On the final step, you’ll be asked: “Do you accept the license terms? [yes | no]”. Type in “yes” and press Enter. |
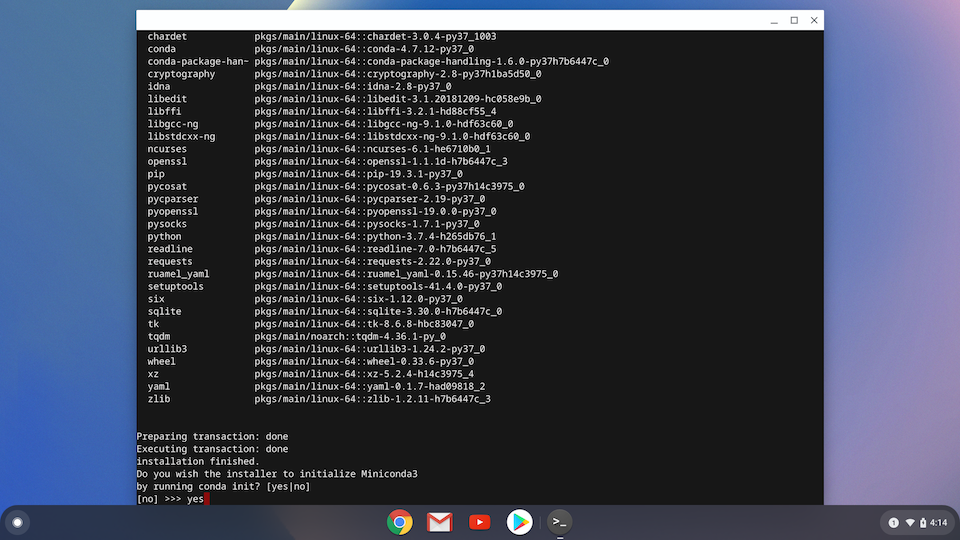
The next step asks where to install Miniconda. The default suggested is /root/miniconda3 however I prefer to use /opt/miniconda3 instead which is a directory commonly used for installing unbundled software packages. So type in /opt/miniconda3 instead.
| When asked, “Do you wish the installer to initialize MiniConda3 by running conda init? [yes | no]” type in yes. |
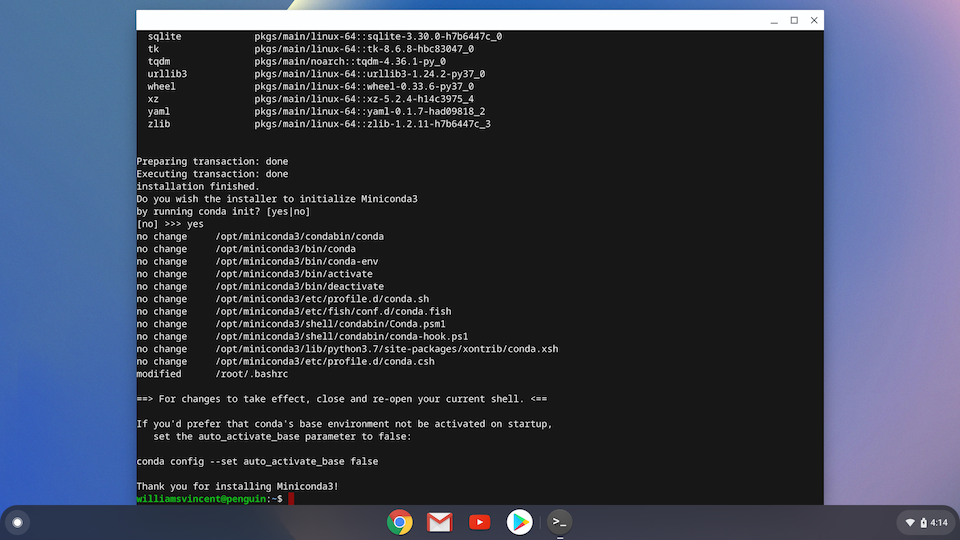
And we’re done! The instructions will note that closing and re-opening the Terminal app is required. Do so.
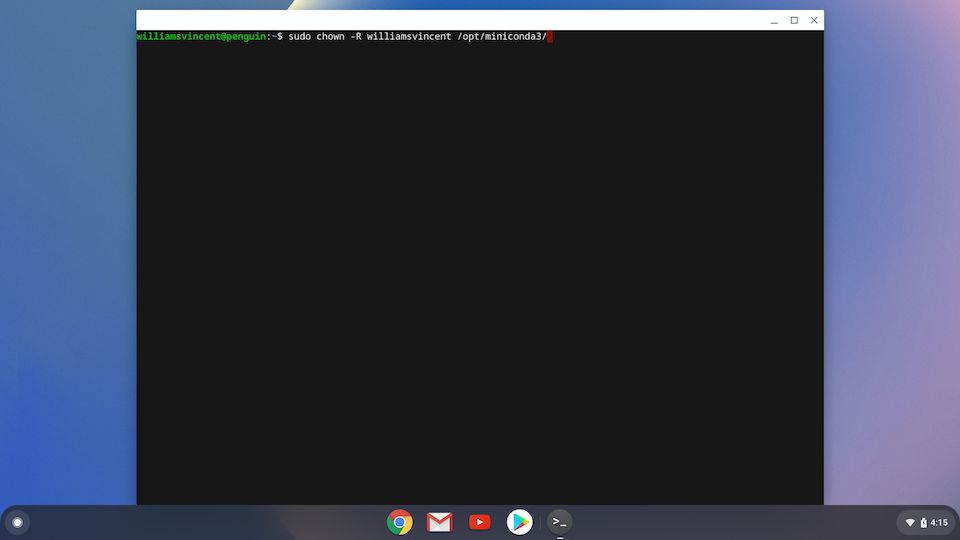
Set the proper permissions for the directory so that conda can add/remove software packages. Make sure to replace my username, williamsvincent, with yours which is found at the beginning of the prompt before @penguin. Also note that if you did not use the /opt/miniconda3 path for installing your miniconda, but rather deferred to the default root/miniconda3, you will have to replace opt with root in the command below.
$ sudo chown -R williamsvincent /opt/miniconda3
To run Conda–and by extension Python–enter a base environment by typing source /opt/miniconda3/bin/activate.
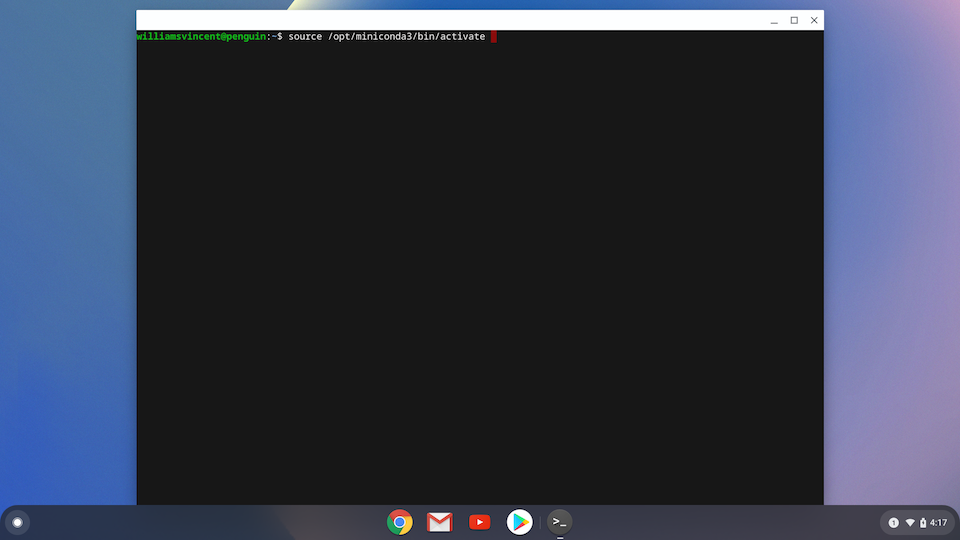
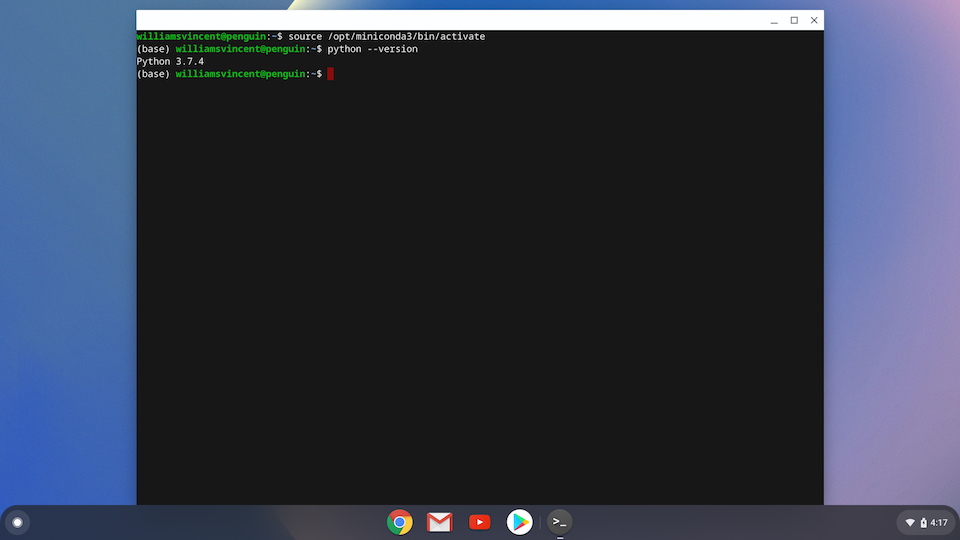
The new parentheses at the start of the prompt called (base) confirm the environment is active. To confirm the installed Python version, type python --version.
$ python --version
Python 3.9.5
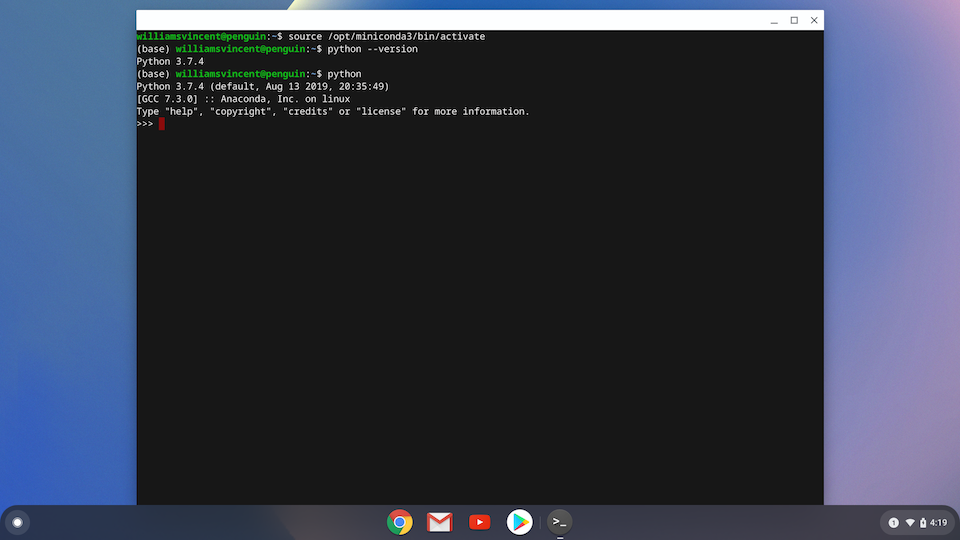
And then to enter Python itself, simply type python.
Next Steps
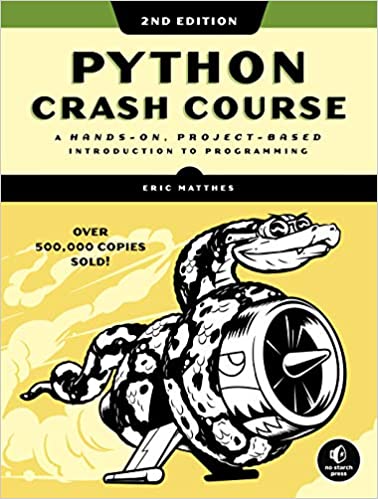
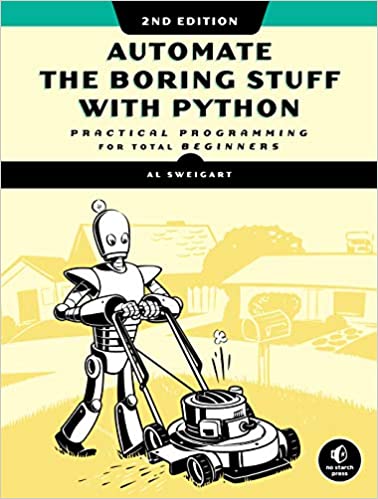
Two excellent beginner-friendly Python books are Python Crash Course and Automate the Boring Stuff. If you’d like to learn web development with Python, check out Learn Django.