Hello, World with Express and JavaScript
In this tutorial we’ll build a Hello, World! application with JavaScript, Node, and Express. It can be done with a remarkably little amount of code however this suite of tools is quite powerful and used at scale by many of the largest websites in the world.
Before we start, here are some key terms to define:
-
NodeJS allows developers to run JavaScript–previously only used in the browser–on the server-side to power web applications.
-
Express is a micro-framework for building web applications on top of NodeJS. It simplifies the creation of a server and basic routing.
-
MongoDB is a NoSQL database commonly used in Node applications. We don’t need it for our Hello, World! app but you would for a more complicated app like a Blog. Note that with Node and Express you are not limited to just MongoDB but can use any type of database including PostreSQL, MySQL, and other relational databases.
Install Node
We’re using Node so you need to install it globally, which means it’s accessible across your entire computer. Later on we’ll install packages locally so only a specific project has access to them.
Here’s how to install Node on a Mac or on Windows.
Hello, World
Now for our Hello, World! web application. The first step is to pick a directory on your computer to hold our files. The choice is up to you; pick an easily accessible location.
If you are on a Mac I recommend using the Desktop folder. If you don’t know what the command line is, I have a short tutorial on it, too. It’s an indispensable part of modern web development.
Here’s how to navigate into the Desktop and create a new folder from the command line.
$ cd ~/Desktop
$ mkdir helloworld && cd helloworld
Great, now we’re working within a dedicated directory and can start to install files for our project. We only need two it turns out.
NPM
NPM is the package manager used by Node.js applications. It contains many modules and we will use it extensively so we don’t have to reinvent the wheel. Fortunately when we installed Node in the previous chapter it automatically also installed the NPM command-line client, which we will use throughout this book.
To configure a new Node project we use a file called package.json which will manage all our dependencies. To configure a new Node project run the command npm init.
$ npm init
For now you can hit Enter through all of the prompts that appear. You’ll see a package.json file has been automatically created. In the text editor of your choice, open the file and you’ll see looks like this:
// package.json
{
  "name": "helloworld",
  "version": "1.0.0",
  "description": "",
  "main": "index.js",
  "scripts": {
    "test": "echo \"Error: no test specified\" && exit 1",
  },
  "author": "",
  "license": "ISC"
}
As a final step, create a new file called index.js which we’ll use to run Node for the first time. You can create this file from the command line using the touch command:
$ touch index.js
Within your text editor, add the following one line of code in the index.js file.
// index.js
console.log('Hello, World! Node is working...');
Now run the file from the command line to see the statement we just logged:
$ node index.js
Hello, World! Node is working...
Pretty cool huh?
Even better, let’s add a start script to our package.json file so we can automatically start up our application simply. For the moment, this command will simply execute the command node index.js but over time we can add more and more complexity here.
Within the package.json file, add the line for “start” under scripts. Make sure not to include a comma , at the end or you will see an error message.
// package.json
{
  "name": "express-for-beginners",
  "version": "1.0.0",
  "description": "",
  "main": "index.js",
  "scripts": {
    "test": "echo \"Error: no test specified\" && exit 1",
    "start": "node index.js" // new!!!
  },
  "author": "",
  "license": "ISC"
}
Now on the command line, try running npm start to start our file. It should work just as before.
Awesome! We’re ready to start using Express and build our actual web app.
Express
Express is a web application framework for Node. It will make our lives much easier in building our basic functionality.
To install Express we’ll use….wait for it…npm.
$ npm install express
Under the hood, Express has been installed in the node_modules folder, which is where all our external dependencies are placed. It is also listed now at the bottom of the package.json file under “dependencies”:
// package.json
...
"dependencies": {
    "express": "^4.16.4"
  }
Ok, Express is installed but we need to tell our web app to use it. Let’s update index.js to do that. Go ahead and delete the previous one line of code in there and type the following:
// index.js
const express = require('express');
const app = express();
We’re setting a variable express that refers to the Express package and then instantiating it in another variable called app. This is the standard way to configure an Express web app.
And now let’s showcase how powerful Express really is! With only one more line of code we can spin up a simple server that we can then visit in our web browser. Add the following code to use Express’s built-in listen method as follows:
// index.js
const express = require('express');
const app = express();

app.listen(3000, () => console.log('listening on port 3000')); // new
Now if you now run npm start on the command line you’ll see our console.log text of “listening on port 3000” and you can open a web browser to http://localhost:3000/.
$ npm start
listening on port 3000
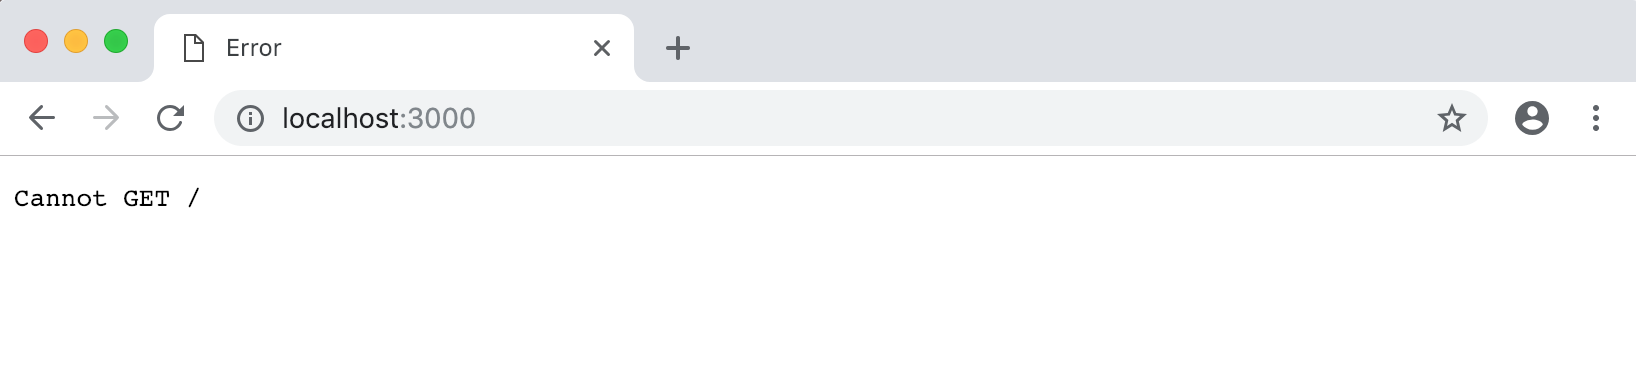
However you’ll see on the web page the message “Cannot GET /” because while we have a server running, we haven’t given it any routing instructions. Let’s do that.
Home page
Routing is a core part of any web application. We need to tell the computer what to do if a user goes to the home page URL, which is typically referenced as /.
Update the index.js file with the following code to set up a homepage:
const express = require('express');
const app = express();

app.get('/', (req, res) => { // new
  res.send('Homepage! Hello world.');
});

app.listen(3000, () => console.log('listening on port 3000'));
We’re using Express’s get method to create our route. We specify that when a visitor hits the homepage at the route /, accept both a request and a response which by convention are shortened to req and res. Note that these are positional arguments so you could call them x and y if you want and whichever one was first would represent the request object and the second one the response object. But don’t do that. It confuses things!
On the command line, type Ctrl+c (the control key and the c key at the same time) to quit the server. And then run npm start to start it up again.
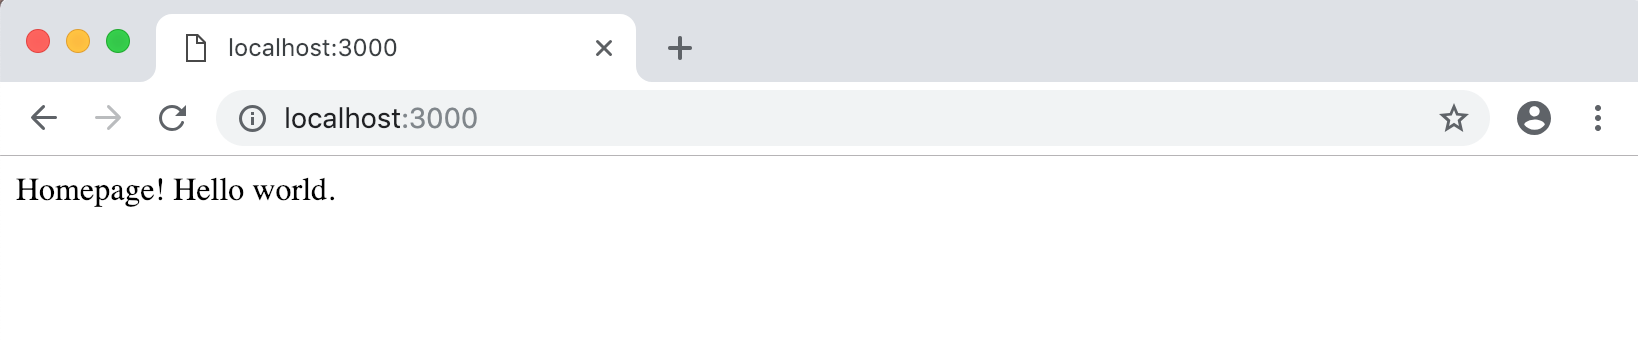
This time if you go to http://localhost:3000/ you’ll see the response “Homepage! Hello world.”
About page
Using this same pattern, we can add additional pages to our web app. For example, how about an About page at the route /about? We can do that very easily within our same index.js file:
// index.js
const express = require('express');
const app = express();

app.get('/', (req, res) => {
  res.send('Homepage! Hello world.');
});

app.get('/about', (req, res) => { // new
  res.send('About page. Nice.');
});

app.listen(3000, () => console.log('listening on port 3000'));
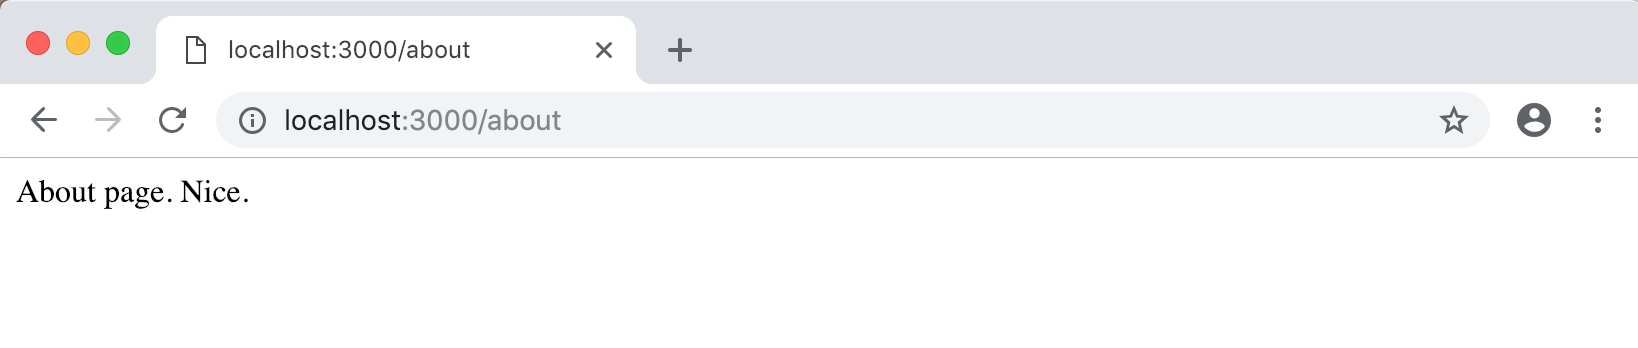
Again, quit the server from the command line with Ctrl+c and then type npm start to start it up again. Navigate to http://localhost:3000/ to see our existing homepage and then http://localhost:3000/about to see the newly created about page!
Conclusion
Getting started with Node and Express is about as easy as it gets. We create a new project with a package.json file, install Express, and then with just a few lines of code we can access a server and set up basic routing for our webpages.
If you want to learn how to build web apps with Express, Wes Bos has an excellent course called Learn Node where you build a full stack restaurant application with users, search, geolocation, and reviews for favorite restaurants from around the world. You can see a live demo here.