A Complete Introduction to React: Build a Beatles Voting App
ReactJS is a library for building UI interfaces. In this tutorial we will build an app for voting on your favorite Beatle. Along the way we will learn about core React concepts such as components, props, event propagation, state, lifecycle methods, and more.
Setup
We will use create-react-app to jumpstart our new React project called beatles-voting-app.
$ npx create-react-app beatles-voting-app
$ cd beatles-voting-app
$ npm start
Open your web browser to http://localhost:3000/ to see the standard React welcome page.
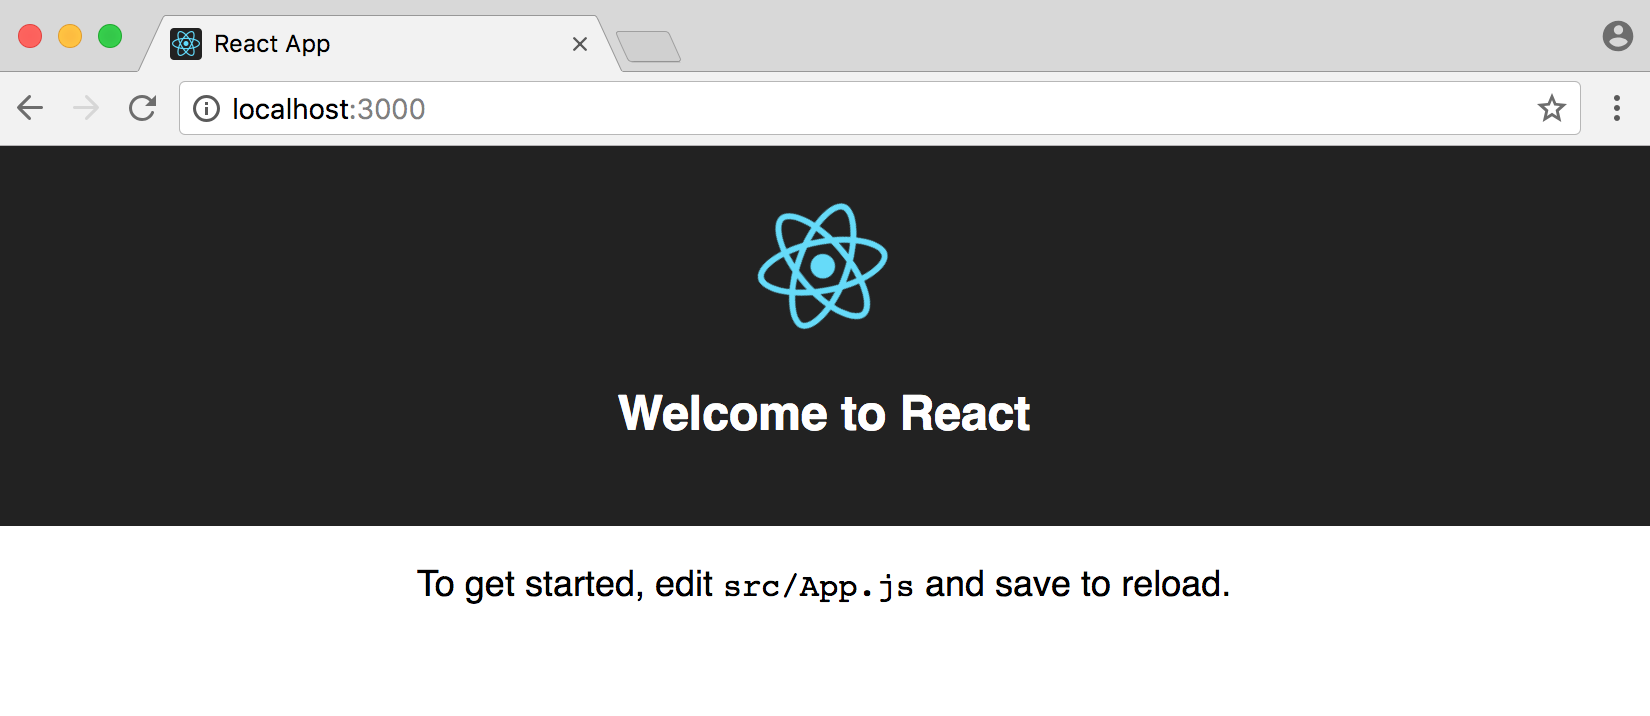
It says we only need to edit src/App.js to get started. So let’s do that!
Hello World
At the top of this file both React and Component are imported. Everything in React is a component, which is basically a reusable piece of code. This means we can write the code for one piece of the UI–for example the header–and then reuse across other parts of the website. No duplication required which keeps things very DRY (Don’t Repeat Yourself).
Our first component provided by create-react-app is called App. Component names must always be capitalized. The component has a render() method which contains the eventual output that is being returned which is a single <div> with the string “Hello, World!”. Then at the bottom of the file we export our component.
Note that our <div> tag uses a className which is a JavaScript-like way to specify a specific class. In traditional HTML we would use <div class="App" but in React always use className in place of class. Over in our App.css file there is an App class that centers the text on the page.
// src/App.js
import React, { Component } from 'react';
import './App.css';

class App extends Component {
  render() {
    return <div className="App">Hello, World!</div>;
  }
}

export default App;
Save your work and notice that the website has automatically updated itself.
That’s another core feature of React. It automatically looks for changes to the UI and makes updates as needed.
You might wonder “where” has our component been exported to? The answer is the src/index.js file. We can update it to look like the following.
// src/index.js
import React from 'react';
import ReactDOM from 'react-dom';
import App from './App';

ReactDOM.render(<App />, document.getElementById('root'));
At the top we import both react and then react-dom which is the web version of React. React can also be used on native apps (iOS, Android) or really anywhere in practice. Then we import our App component. Using ReactDOM we are setting our component to the HTML id of root.
Over in public/index.html there is one single <div> for our entire web page which is <div id="root"></div>. All of our React components will be attached to this single div.
This is a lot to take in at first but here’s the structure of any React app stated once again. There is a single <div> in our public/index.html file. The src/index.js file renders a single component, often called App, that is attached to this div. Within the App component we can stack as many other reusable components as we like. So even if we had 100 components in our React project, there would be a single HTML id and a single App rendered in src/index.js. We will see shortly how to make our React components reusable!
Reusable Components
We will have two components in this project: App which lists all our Beatles we can vote on and then Beatle for each individual Beatle member.
We’ll add this new Beatle component and have it output our “Hello, World!” text for us. The App component now returns the Beatle component.
// src/App.js
import React, { Component } from 'react';
import './App.css';

class App extends Component {
  render() {
    return <Beatle />;
  }
}

class Beatle extends Component {
  render() {
    return <div className="App">Hello, World!</div>;
  }
}

export default App;
If you look again at our web browser at http://localhost:3000/ the page is the same.
This is known as a parent-child relationship (App is the top-level parent component and Beatle is the child component nested within it) and is fundamental to React. We can nest components as many layers deep as we like with this approach.
props
React components can accept arbitrary inputs known as props which is short for “properties.” This is a way to pass data between components and is another fundamental part of React. The key thing to know is that data transfer is unidirectional (one-way); it flows top-down from parent to child component.
For example, let’s set a prop of our first Beatle, “John Lennon” in our parent App component and pass it down to the Beatle component. We can reference this prop via this.props.name where this.props refers to any/all props set in App and name is the specific one we have created at this point. When App renders the Beatle component it will attach this prop automatically.
// src/App.js
import React, { Component } from 'react';
import './App.css';

class App extends Component {
  render() {
    return <Beatle name="John Lennon" />;
  }
}

class Beatle extends Component {
  render() {
    return <div className="App">{this.props.name}</div>;
  }
}

export default App;
If you look again at our web browser, it displays the name of our single Beatle.

Using props allows for a canonical source of data that can be passed around our application. We set it once and can reference it wherever we want. This is a very powerful feature, especially as our React app grows in complexity.
Data models
Let’s make a data model to represent Beatles members. To start it will contain just one member, but soon it will have all four.
Create a list variable with the data on our first Beatle. Then within our App component we can access the first and only element in our member variable array and set it as a prop.
// src/App.js
import React, { Component } from 'react';
import './App.css';

const list = [
  {
    name: 'John Lennon',
  }
]

class App extends Component {
  render() {
    const member = list[0];
    return <Beatle
      name={member.name}
    />;
  }
}

class Beatle extends Component {
  render() {
    return <div className="App">{this.props.name}</div>;
  }
}

export default App;
If you look at the web browser it still simply outputs “John Lennon.”
Multiple Beatles
Now let’s add all four Beatles to our list data set. We can loop over them in App to display the name of each using JavaScript’s map() method.
// src/App.js
import React, { Component } from 'react';
import './App.css';

const list = [
  {
    name: 'John Lennon'
  },
  {
    name: 'Paul McCartney'
  },
  {
    name: 'George Harrison'
  },
  {
    name: 'Ringo Starr'
  }
];

class App extends Component {
  render() {
    return list.map(member =>
      <Beatle
        name={member.name}
      />);
  }
}

class Beatle extends Component {
  render() {
    return <div className="App">{this.props.name}</div>;
  }
}

export default App;
If you look at the browser we see all four Beatles now!
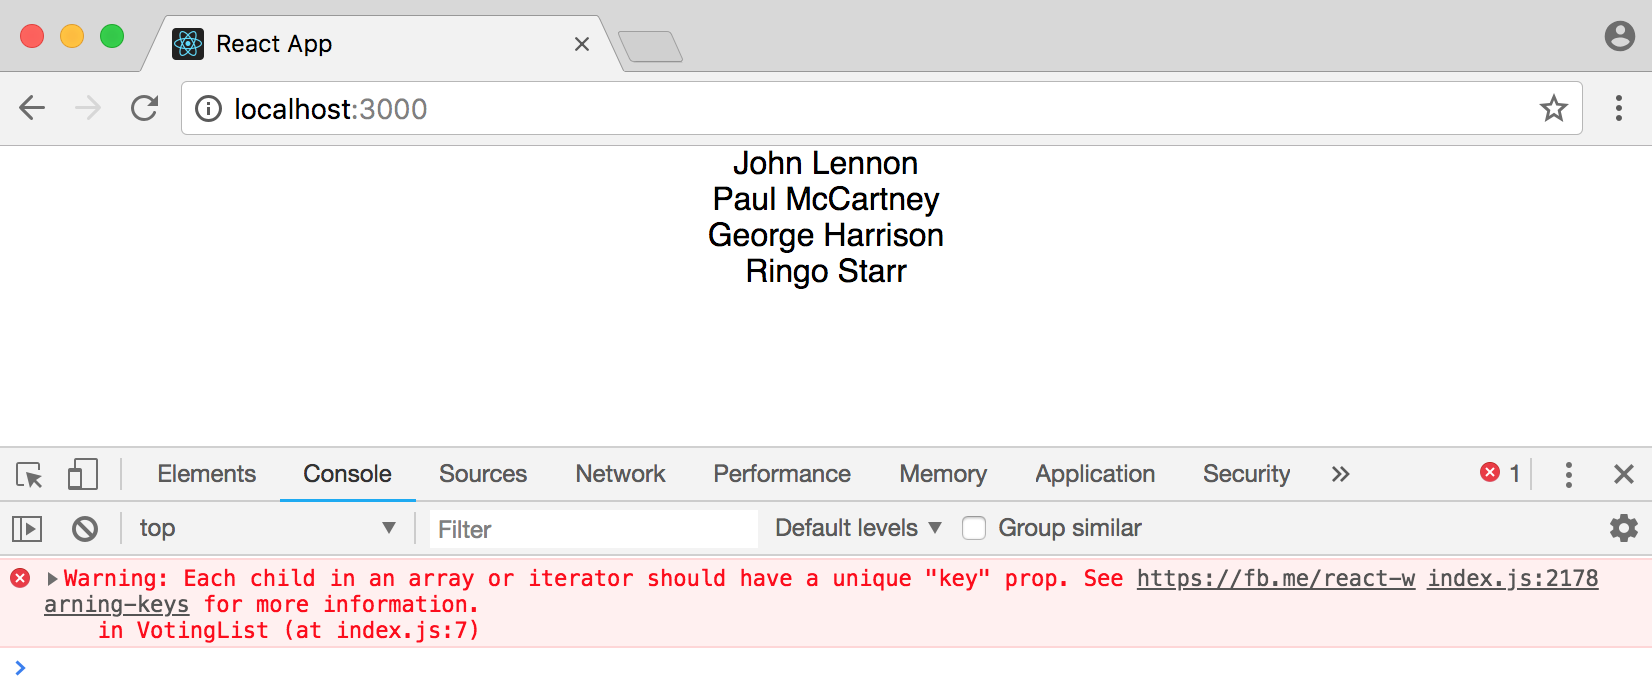
But open up your developer console and React is telling us there’s an error. We haven’t set a unique “key” prop which React needs to work correctly. This is a best practice you should always follow. We can quickly update our data set with another field called id and then include it in our App props.
// src/App.js
const list = [
  {
    id: 1,
    name: 'John Lennon'
  },
  {
    id: 2,
    name: 'Paul McCartney'
  },
  {
    id: 3,
    name: 'George Harrison'
  },
  {
    id: 4,
    name: 'Ringo Starr'
  }
];

class App extends Component {
  render() {
    return list.map(member => <Beatle key={member.id} name={member.name} />);
  }
}
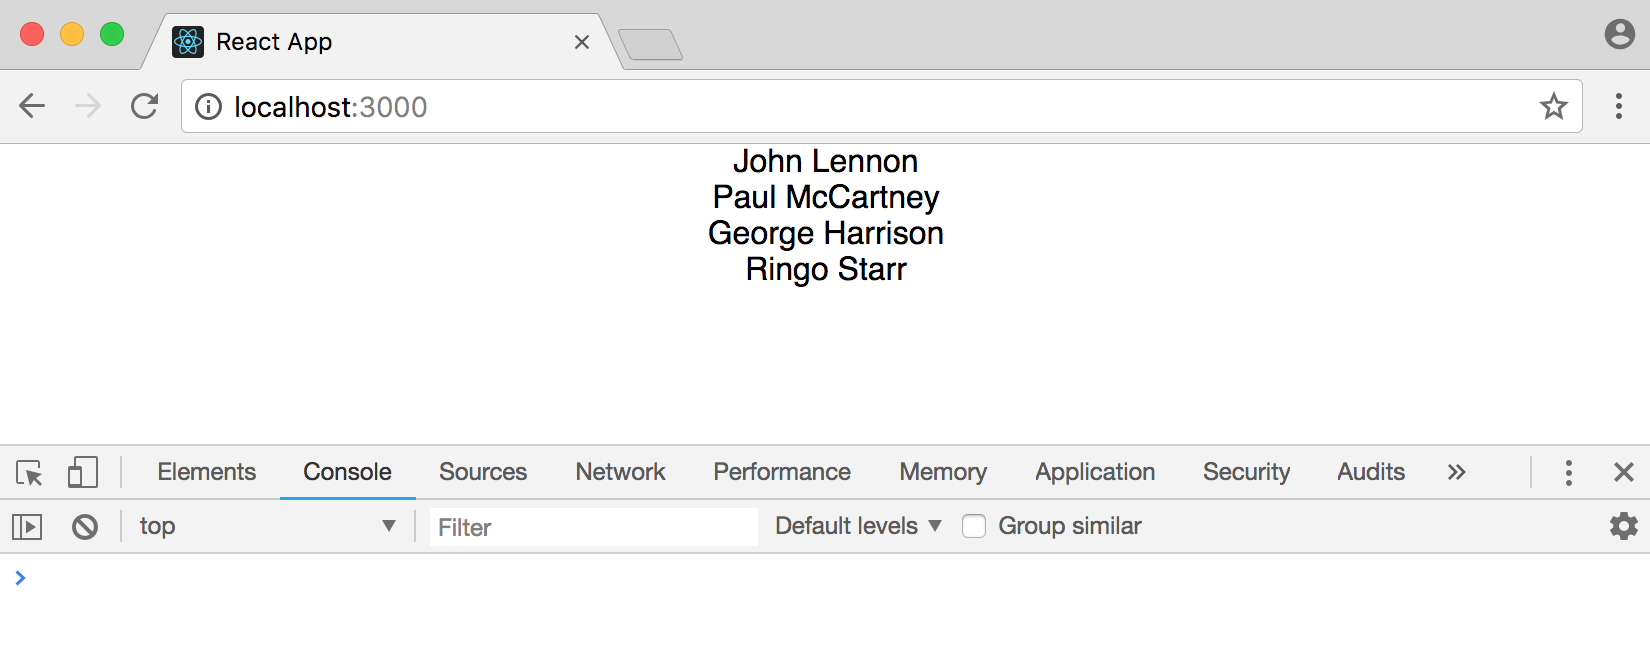
Problem solved! Under the hood React uses a virtual DOM for updates and performs a diff against the actual DOM, thereby only updating what’s changed, not the entire DOM. This is a major reason why React apps, once loaded, perform so well.
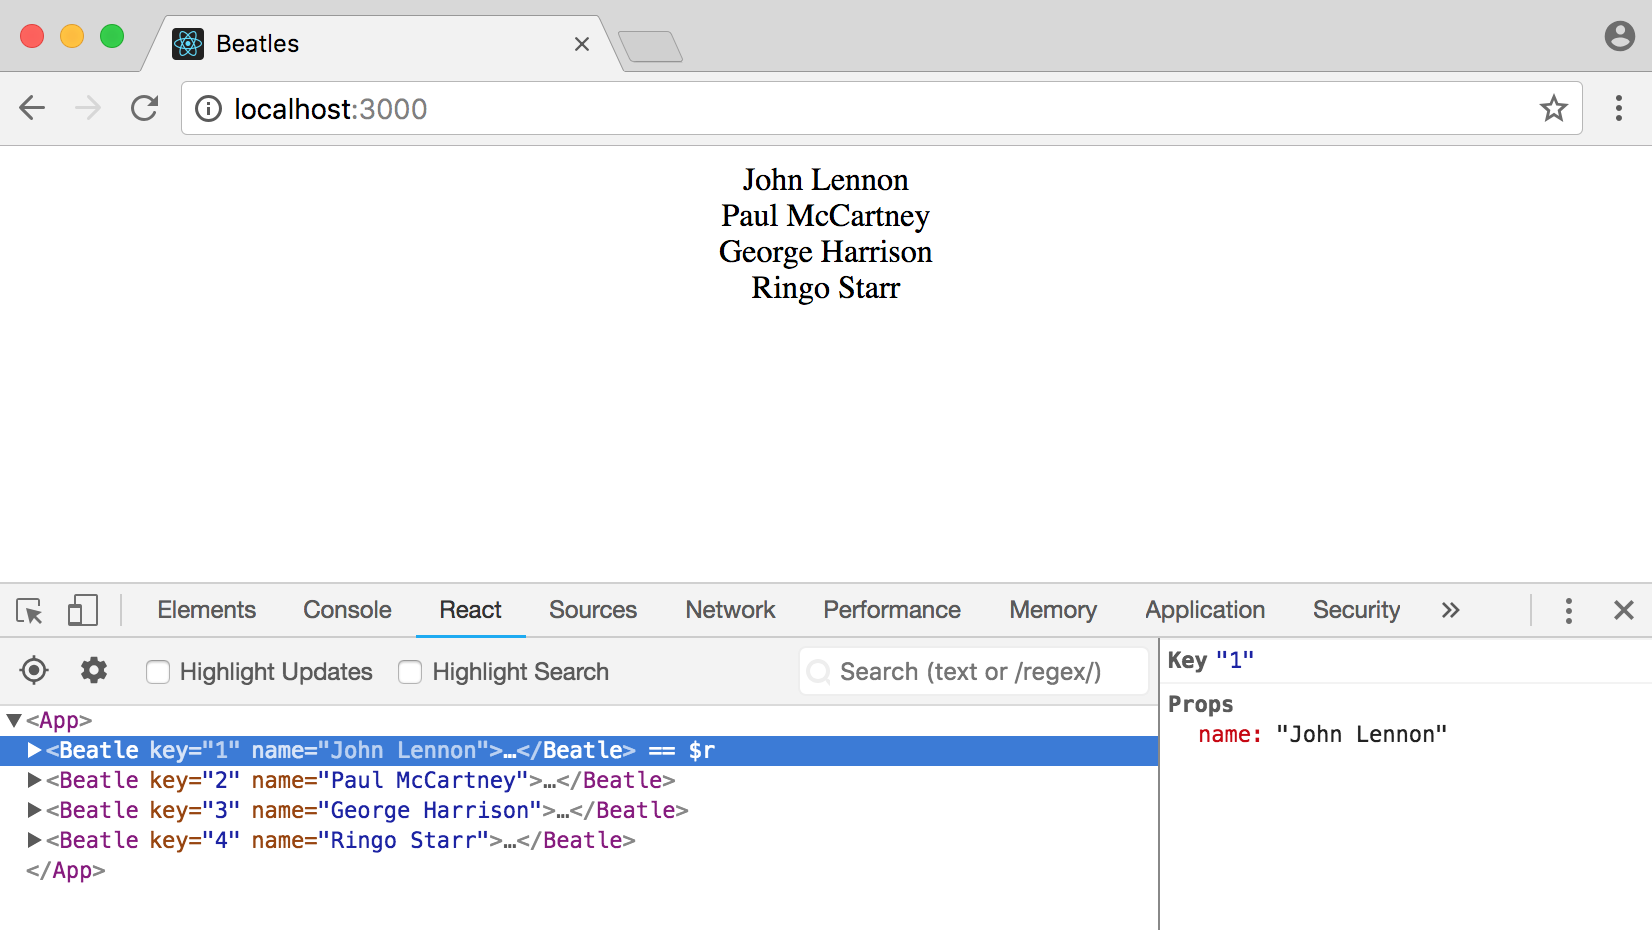
It’s important to note that we now have five components: our App component and four separate Beatle components. We can visualize this using React Developer Tools in our Dev Console. Download the extension for your browser.
Then within dev tools click on “React” and you can see all components as well as the specific props and key for each.
Events
Since this is a voting app we need a way for users to vote on their favorite Beatle. Let’s start by configuring a button for the “event” when a user votes. React has its own onClick event we can use.
What happens if we configure our button to output some text to the console.
// src/App.js
class Beatle extends Component {
  render() {
    return (
      <div className="App">
        {this.props.name} <button onClick={console.log('button clicked')}>+</button>
      </div>
    );
  }
}
If you look at the browser again at http://localhost:3000/ you’ll see the dev console is saying “button clicked” occurred four times! Now why is that?
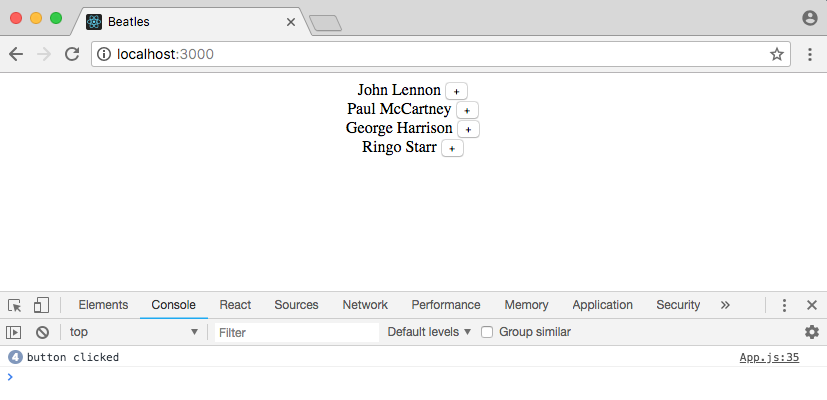
The answer is that when the Beatle component is rendered, all functions–including onClick–are fired. Everything within render is rendered on page load, which makes sense if you think about it. Since the Beatle component is rendered four times, one for each Beatle in our list, the button is clicked four times too automatically.
The way to fix this rendering on load is to pass a function to the event handler. This is also known as a callback function. That way when the component is rendered the function is available, but not yet called. It is only called when you click on the button. Furthermore we are using an arrow function here so this is automatically bound to the component, Beatle. This will be important shortly.
// src/App.js
{this.props.name} <button onClick={() => console.log('button clicked')}>+</button>
Each time a button is clicked now render will be called again which is bad for performance. The major reason React is performant is that it minimizes re-rendering of the DOM. Therefore you should always move anonymous functions outside of render itself, which we can do with handleClick.
// src/App.js
class Beatle extends Component {
  handleClick = () => console.log('button clicked');

  render() {
    return (
      <div className="App">
        {this.props.name} <button onClick={this.handleClick}>+</button>
      </div>
    );
  }
}
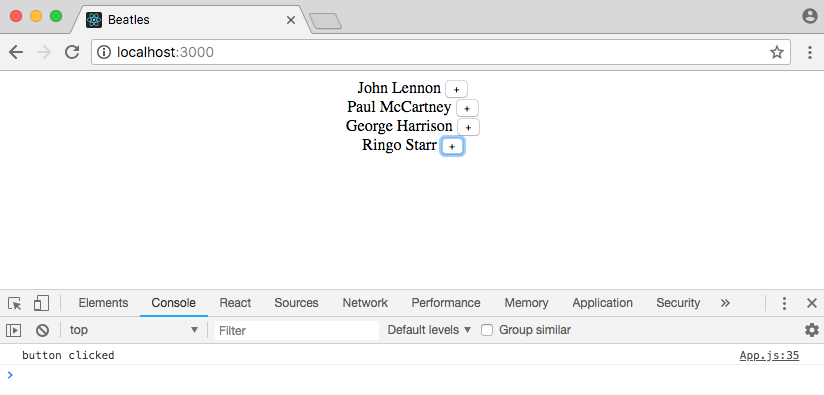
If you check the web browser the functionality is the same. This pattern of using an event listener like onClick and passing it a callback function outside of render like handleClick is very, very common in React.
Event Objects
Ok so we are registering the click event but…what do we do with it, right? Whenever a DOM event occurs we have access to the event object which represents information about that DOM change.
If we pass an argument to our event handler it will be automatically be set to the event object. We can name this argument anything in practice but typically it is referred to as event or e for short.
// src/App.js
class Beatle extends Component {
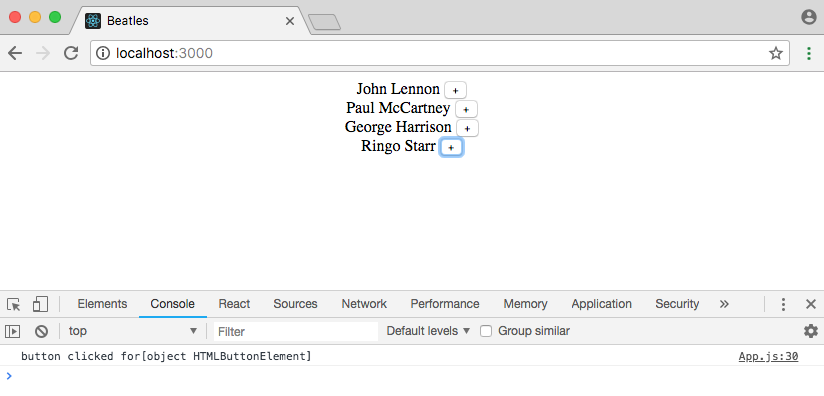
handleClick = e => console.log('button clicked for' + e.target);
render() {
return (
<div className="App">
{this.props.name} <button onClick={this.handleClick}>+</button>
</div>
);
}
}
This event object e contains DOM information about the mouse click. We can further specify the object that dispatched the event–our button element in this case–by using e.target. MDN has a more complete explanation of this functionality.
The point of this example is to show that we can store information about an event and then pass it around in our React app.
Event Propagation
Let’s put all the pieces together. We want our parent App component to be notified whenever the button for a particular Beatle was clicked. We already have a click handler and our event object. What’s left is a way to pass this data, the event object, up to the App component.
We can do this by using yet another callback function. And we can pass this callback function down to Beatle using props! So create a second custom method, handleEvent, within App. Then add a prop to Beatle called onVote that refers to this custom method. Finally when handleClick is fired in Beatle we will bind it to onVote.
// src/App.js
class App extends Component {
  handleEvent = () => console.log('button clicked');

  render() {
    return list.map(member => <Beatle key={member.id} name={member.name} onVote={this.handleEvent} />);
  }
}

class Beatle extends Component {
  handleClick = () => this.props.onVote();

  render() {
    return (
      <div className="App">
        {this.props.name} <button onClick={this.handleClick}>+</button>
      </div>
    );
  }
}
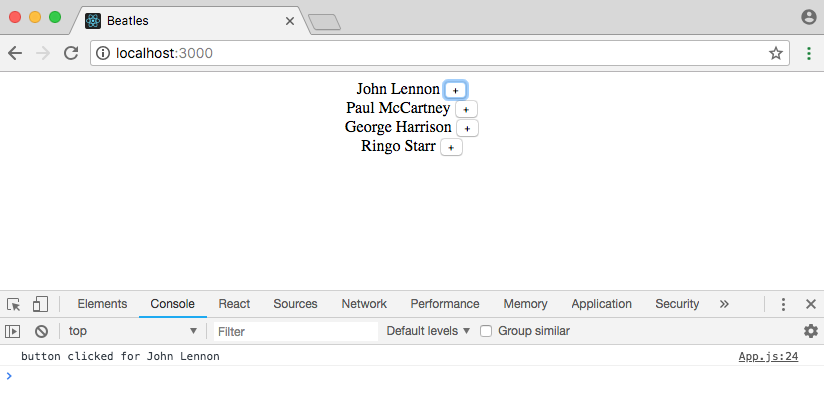
If you look at the browser now whenever a button is clicked the output is “button clicked,” the same as before, yet the data is now in our parent App component, not within Beatle.
As the final step we want to set the event object to the name of the Beatle that was clicked. Currently onVote is just bound to an anonymous function (). However we can set this to this.props.name which means the event object will contain the name of the Beatle component. Then we can add the event object e to handleEvent and output the name of the Beatle component that was clicked.
// src/App.js
class App extends Component {
  handleEvent = e => console.log('button clicked for ' + e);
  ...
}

class Beatle extends Component {
  handleClick = () => this.props.onVote(this.props.name);
  ...
}
And everything works as desired!
The chain of execution for our webpage is now this:
- React
renders the page and its two components onClicktells React to set up a click event listener- When the button is clicked, React calls
handleClick handleClicksets the proponVoteto thenamevalue of the prophandleEventtakes the event objecte, which isprops.nameand console logs it
The concept of using functions in event handlers is, I think, the most difficult part of learning React. It requires full understanding of callback functions, DOM event objects, and how rendering really works in React. So don’t worry if it hasn’t clicked for you yet: this pattern of using event handlers and functions will be repeated again and again and again in your React projects.
You can click on the button next to any Beatle now and the dev console will display their name and the number of times the button has been clicked.
Votes
Now we need a way to track votes for each Beatle. First we add a votes property for each Beatle, which we can hardcode into our list data set.
// src/App.js
const list = [
  {
    id: 1,
    name: 'John Lennon',
    votes: 0
  },
  {
    id: 2,
    name: 'Paul McCartney',
    votes: 0
  },
  {
    id: 3,
    name: 'George Harrison',
    votes: 0
  },
  {
    id: 4,
    name: 'Ringo Starr',
    votes: 0
  }
];
Then we attach it to our Beatle props as {member.votes}. And display it within Beatle as {this.props.votes}.
class App extends Component {
  handleEvent = e => console.log('button clicked for ' + e);

  render() {
    return list.map(member => (
      <Beatle key={member.id} id={member.id} name={member.name} votes={member.votes} onVote={this.handleEvent} />
    ));
  }
}

class Beatle extends Component {
  handleClick = () => this.props.onVote(this.props.id);

  render() {
    return (
      <div className="App">
        {this.props.name} <button onClick={this.handleClick}>+</button> {this.props.votes}
      </div>
    );
  }
}
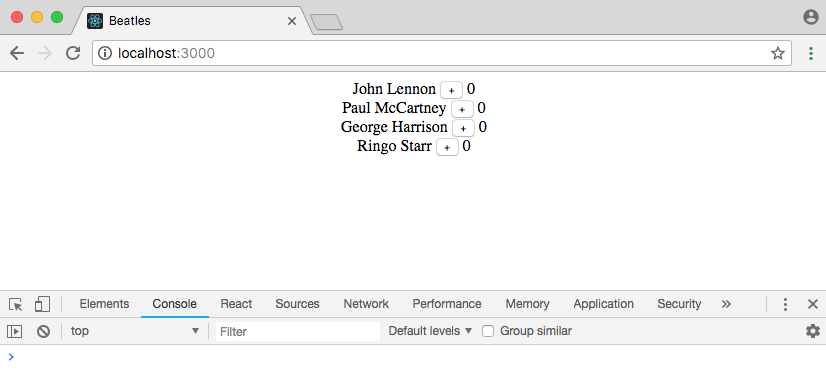
The result is a 0 next to each Beatle.
But what we really need is a way to record and update the number of votes throughout our entire app. This is known as state.
State
In React state is an object that tracks all of the actions that have occurred, past and present. It is one big object.
While props are immutable and owned by a component’s parent, state is owned by each component itself. Whenever the state or props of a component update, the component will re-render itself.
Since we want to track the state of all four Beatles we will create an initial state with the parent App component and set it to an empty array []. Then we can use the React lifecycle componentDidMount method to load our list data as the variable members before the component itself is rendered. This is an ideal way to asynchronously add data to a component.
Since we are using state to manage our data now in the render call we need to change list to this.state.members to be mapped over.
// src/App.js
class App extends Component {
  state = {
    members: []
  };

  componentDidMount() {
    this.setState({ members: list });
  }

  handleEvent = e => console.log('button clicked for ' + e);

  render() {
    return this.state.members.map(member => <Beatle key={member.id} name={member.name} onVote={this.handleEvent} />);
  }
}
If you refresh the browser it will appear that nothing has changed. Yet something very big has changed: we are now storing our state within the App component. The final, missing piece is updating our handleEvent method to update the votes count when a vote button is clicked.
Updating State
We want a way to check that a particular click event object matches a particular Beatle. Right now we’ve set the event object to be equal to the name prop but there is a better way. We can add another prop called id which will match the existing id, 1-4, of the Beatles.
class App extends Component {
  ...
  render() {
    return this.state.members.map(member => (
      <Beatle key={member.id} id={member.id} name={member.name} votes={member.votes} onVote={this.handleEvent} />
    ));
  }
}

class Beatle extends Component {
  handleClick = () => this.props.onVote(this.props.id);
  ...
}
Note that we can’t use the prop key for this purpose because it is reserved for React’s internal usage. But we can assign id to the id value just the same without conflict.
Now when you click on the button the id for a Beatle is logged to the console, not their name.
Then we update the handleEvent method. First we can change the name of the event object–it is just positional, so the name can be anything–to the more descriptive memberId. Then we map over our current members state and if the id of a voting click matches that of an existing Beatle, we use Object.assign() to create a new member object with an updated votes property. If there is no match, we just return the existing member object. Finally we update our state to the new updatedList.
// src/App.js
handleEvent = memberId => {
  const updatedList = this.state.members.map(member => {
    if (member.id === memberId) {
      return Object.assign({}, member, {
        votes: member.votes + 1
      });
    } else {
      return member;
    }
  });

  this.setState({
    members: updatedList
  });
};
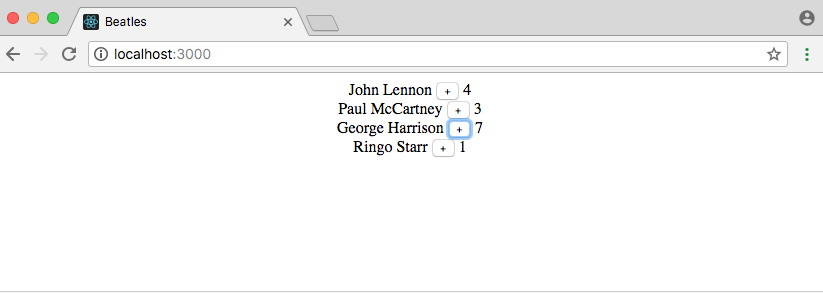
Back in the browser you’ll find that if you click on the button next to any Beatle the voting count increases and is stored over time.
Conclusion
And we’re done! We have now created a Beatles voting app from scratch. Along the way we learned about components, props, events, and state.
In a large-scale React app you will likely have many more components and use more lifecycle methods, but the overall concepts will remain the same. You may even find that managing state becomes a challenge, in which case you should check out Redux.
Want to learn more React? I have a list of recommended React books and JavaScript books.