React Counter Button
Let’s build a simple counter button in React that will update every time it is clicked.
To start, create a new React app called counter using create-react-app.
$ npx create-react-app counter
$ cd counter
$ npm start
Open your web browser to http://localhost:3000/ to see the standard React welcome page. We only need to update the src/App.js file in this tutorial.
Counter component
Now we need to create our Counter component. First we can add it to App. Then create Counter and include a static button which will be set to 0.
// src/App.js
class App extends Component {
  render() {
    return (
      <div className="App">
        <Counter />
      </div>
    );
  }
}

class Counter extends Component {

  render() {
    return <button>0</button>;
  }
}

export default App;
If you go to http://localhost:3000/ you’ll see our static button now.

props
Props are a way to pass read-only data from a parent to a child component. They are a good intermediate step before jumping into state, which is how we will eventually make our counter dynamic.
We can add a count prop to our counter and set it to a value of 5. Then we can reference this prop as {this.props.count} in our button. Props are automatically passed down from parent to child component upon rendering.
// src/App.js
import React, { Component } from 'react';
import './App.css';

class App extends Component {
  render() {
    return (
      <div className="App">
        <Counter count={5}/>
      </div>
    );
  }
}

class Counter extends Component {

  render() {
    return <button>{this.props.count}</button>;
  }
}

export default App;
Go back to http://localhost:3000/ and you’ll see our static button now has the value of 5.

State
Now we can swap out props for state. First remove the count prop from App as it is no longer needed. Then set an initial state within Counter to the value of 42. We can then use {this.state.count} to refer to our state instead of the previous {this.props.count}.
// src/App.js
import React, { Component } from 'react';
import './App.css';

class App extends Component {
  render() {
    return (
      <div className="App">
        <Counter />
      </div>
    );
  }
}

class Counter extends Component {
  state = {
    count: 42
  };
  render() {
    return <button>{this.state.count}</button>;
  }
}

export default App;
Our button now shows the initial state value, which is 42.

Event Handlers
Finally we can add an event handler so that whenever the button is clicked, the count is increased by 1. The first step is to use React’s onClick synthetic event. We’ll have it just display an alert whenever the button is clicked.
// src/App.js
import React, { Component } from 'react';
import './App.css';

class App extends Component {
  render() {
    return (
      <div className="App">
        <Counter />
      </div>
    );
  }
}

class Counter extends Component {
  state = {
    count: 0
  };
  render() {
    return <button onClick={alert('Click me...')}>{this.state.count}</button>;
  }
}

export default App;
If you go back to the webpage you’ll see the alert is already present though before we’ve clicked the button…hmmm.

This happens because anything within a render method is invoked upon page load. The way around this is to use an arrow function so that only the function is loaded and then upon click, it is invoked and displayed our message. Here’s what that looks like.
// src/App.js
...
  render() {
    return <button onClick={() => alert('Button clicked!')}>{this.state.count}</button>;
  }
}
...
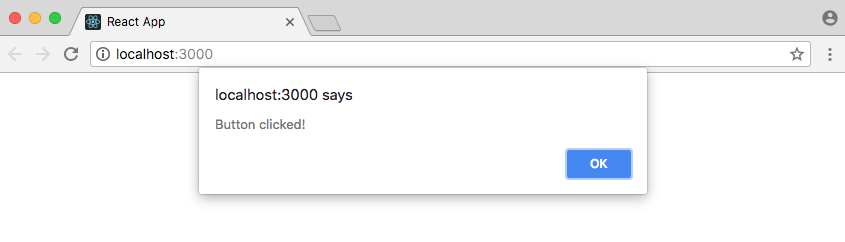
Now there is no alert when you visit the webpage but once the button is clicked, our new alert pops up.
Updating State
The final step is to update state whenever the button is clicked. We could inline this function.
// src/App.js
...
  render() {
    return <button onClick={() => this.setState({ counter: this.state.counter + 1})}>{this.state.count}</button>;
  }
}
...
But it is much more readable–and performant–to move this outside of render() to its own method called handleClick which is also an arrow function so that it only fires upon a button click. A nice feature of arrow functions is that this is implicitly set for us so we don’t also have to explicitly bind our function.
// src/App.js
class Counter extends Component {
  state = {
    count: 0
  };
  handleClick = () => {
    this.setState(({ count }) => ({
      count: count + 1
    }));
  };
  render() {
    return <button onClick={this.handleClick}>{this.state.count}</button>;
  }
}
As a final optimization we can use prevState which is built into React. It is a callback function that refers to the previous state and since setState() is asynchronous, using prevState ensures no errors around this timing.
// src/App.js
handleClick = () => {
  this.setState((prevState, { count }) => ({
    count: prevState.count + 1
  }));
};
Here is what our webpage looks like now after 7 clicks. You can do as many as you like.

Conclusion
This example is pretty simple but it covers some common patterns in React. Components are reusable which means we can stack them one on top of the other in parent-child relationships like App and Counter here. This leads to DRY (Don’t Repeat Yourself) code.
We initially created a static version of our project. Then we added in props, which are read-only. Our event handler was wired up and used an arrow function so that it only worked when selected, not on page load which is the default behavior for any function within render. Then added in an initial state and could make a one word change to our count reference from this.props.count to this.state.count. And finally we created a custom function outside of the render method that applied logic to our event and updated the state via setState().
In a more complex React application we would start using lifecycle methods but this basic example actually covers most of the core React features.
Want to learn more React? I have a list of recommended React books and JavaScript books.