React Real-time Inputs
Let’s build an input box that outputs its contents in real-time. This gives us a chance to review React events and state.
To start, create a new React app called realtime-input using create-react-app.
$ npx create-react-app realtime-input
$ cd realtime-input
$ npm start
Open your web browser to http://localhost:3000/ to see the standard React welcome page.
Input
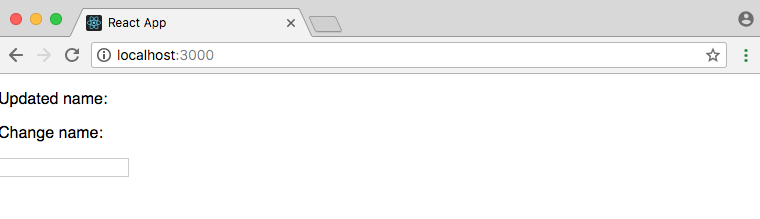
The first step is to create an input box within our render function. We can also add above it a section for the eventual name input.
// src/App.js
import React, { Component } from 'react';

class App extends Component {
  render() {
    return (
      <div>
        <p>Updated name: </p>
        <p>Change name:</p>
        <input type="text" />
      </div>
    );
  }
}

export default App;
Events
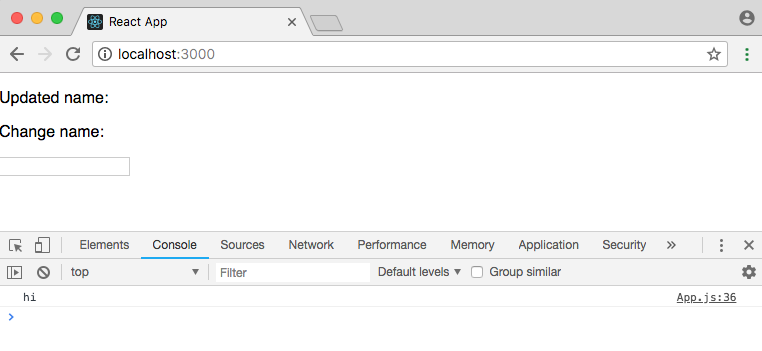
React ships with a number of synthetic events that work across all browsers. One of these is onChange which will capture any changes to our input box. Let’s tell it to log “Hi” to the dev console once clicked.
// src/App.js
import React, { Component } from 'react';

class App extends Component {
  render() {
    return (
      <div>
        <p>Updated name: </p>
        <p>Change name:</p>
        <input type="text" onChange={console.log('hi')}/>
      </div>
    );
  }
}

export default App;
If you look at the webpage you can see that “Hi” is logged even before we type anything.
That’s not what we want. The reason is that when render is fired everything within it is called. Since we don’t want this action to happen until after the button is clicked we need to pass in an arrow function instead.
// src/App.js
<input type="text" onChange={() => console.log('Hi')} />
Now if you revisit the page there is nothing in the console until you start typing within the input box.
State
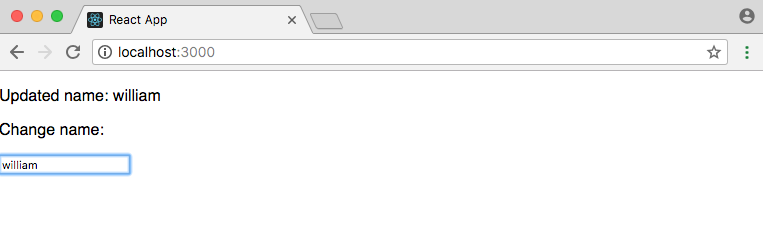
We need somewhere to store our input which is where setState comes in. We can set an initial state at the top of our app and give a default value to name which will hold the result of the input box.
Then we can capture the onChange event object and pass it as the variable e to our arrow function. By using e.target.value we obtain the value of the input box itself.
Finally we can output the name using our state as {this.state.name}.
// src/App.js
import React, { Component } from 'react';

class App extends Component {
  state = {
    name: ''
  };
  render() {
    return (
      <div>
        <p>Updated name: {this.state.name}</p>
        <p>Change name:</p>
        <input
          type="text"
          onChange={e => {
            this.setState({
              name: e.target.value
            });
          }}
        />
      </div>
    );
  }
}

export default App;
If you look at the webpage again you’ll find that typing in text has it outputted next to “Updated name: “ as desired.
Controlled Components
There’s one final step we should make. React components control their own state, but HTML forms like <input> by default have their own state, too. We should explicitly set the <input> state to match the state of our React component, which we can do by setting a value for it.
// src/App.js
...
<input
  type="text"
  value={this.state.username} // new!
  onChange={e => {
    this.setState({
      name: e.target.value
    });
  }}
/>
...
And we’re done.
Conclusion
In this basic example we created an HTML input, captured its value via an event object, and transmitted that value into the state of the App component.
Want to learn more React? I have a list of recommended React books and JavaScript books.